Destiny Wrath of the Machine Siege Engine boss - How to repair, use engine parts and travel down the wall
Survive getting crushed and use the Engine yourself to get off the wall.

Welcome to the second part of the Raid with Wrath of the Machine's Siege Engine boss, in what is perhaps one of the most unique and exciting encounters we've seen in Destiny to date. It's also one of the most challenging to understand and get right, but hopefully you have as much fun as we did learning and finishing it. All aboard!
Wrath of the Machine Siege Engine boss - How to survive the opening and Travel down the Wall
A summary of the steps to beat the Siege Engine boss are:
- The Siege Engine will start coming towards you. Snipe the two turrets either side of the Engine's 'face' until the insides are exposed. Shoot that to cause a panel on the left side to emerge.
- Jump onto the panel and the Siege Engine itself. After it smashes through the wall, run to the top and leap off, and run forward to the far wall.
- Clear the enemies so that four machine parts drop.
- Take it in turns to move these parts back to the Siege Engine, and put them in position to restart the Engine.
Note! Heroic difficulty introduces additional mechanics during this battle. Once you are accustomed to beating Siege Engine normally, see our Wrath of the Machine Hard mode article to see what's new.
Detailed breakdown to beating the Siege Engine boss:
This encounter is arguably simpler than the others, but there's a lot of little nuances to be aware of, so practice makes perfect.
At the start, have most player snipe the two turrets on the 'face' of the Siege Engine. After enough shots, then shoot the exposed middle to cause a panel on the left to fall off.

While this is happening, enemies ahead will attack the party. Have two players take care of these while the above is happening - a tether will help keep them occupied while you follow up with damage. Having someone pop a Weapons of Light bubble for the snipers will also help with their damage output. As such, it's worth waiting to start this encounter when you have Supers ready to go, and make sure everyone uses the Special ammo cache on the behind wall to give them plenty of sniper rounds to last.
When the panel drops off, everyone should be free and able to run left and leap onto the Siege Engine. If someone died, have someone jump off the other side then the Engine passes over them to revive, and re-board. Have everyone stand at the top, but not at the front (the stairs are a good place) since when it smashes the wall it'll cause explosive damage.
Wrath of the Machine Siege Engine boss - How to repair the engine with the engine parts
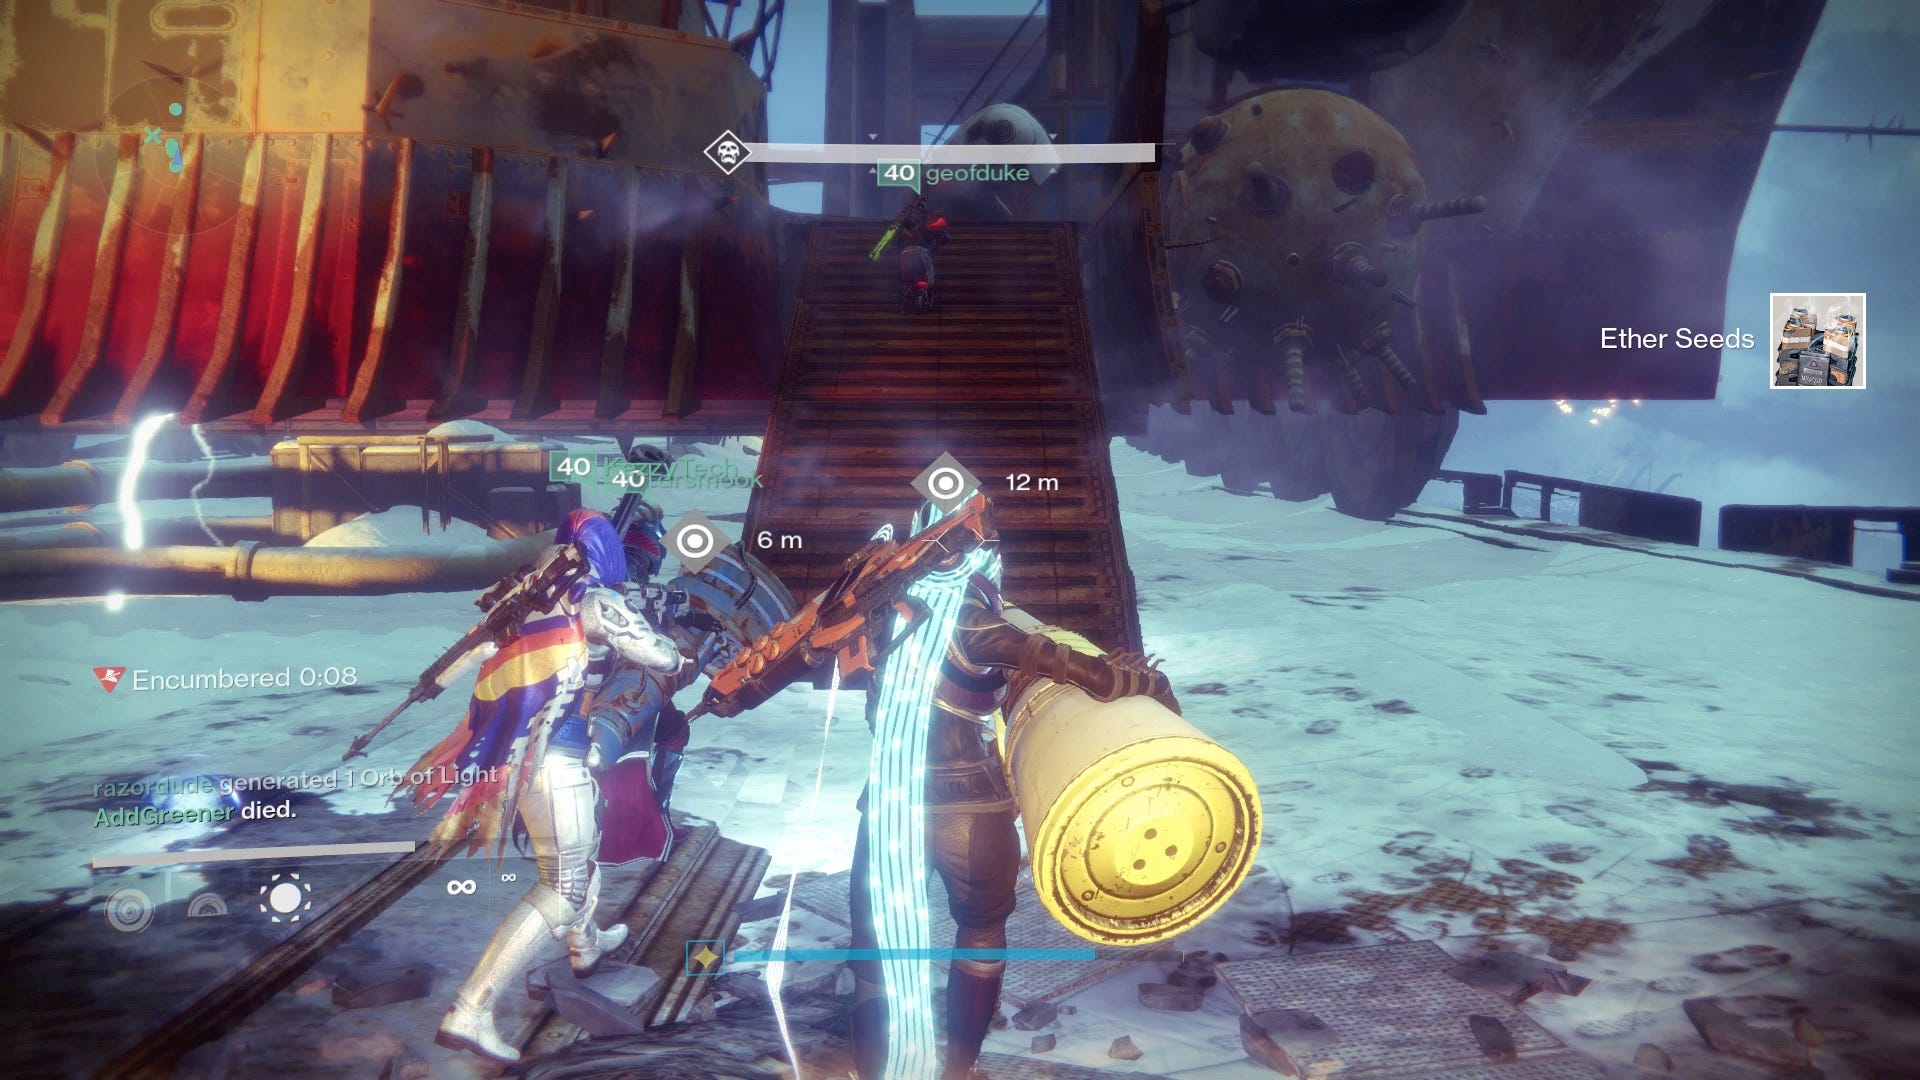
Once done, wait just a moment and jump off the ledge, running forward to the next wall. Here, enemies will drop in. Have everyone clear them quickly - a tether here will also help if you have one - and once done, four machine parts will drop.
Now, you have to take these four machine parts back to the Siege Engine, but there are a few catches. One, there is a hidden timer, so you have to be as quick as you can. Two, when you start to carry a weapon part, you'll become exhausted within 10 or so seconds, and have a cool down before you can pick one up again. As such, you need to rotate between players shooting enemies around you and collecting the parts.
When you pick up the parts and start to go down the ramp into the below area, have a non-carrier lead the pack and wait a moment. Mines will spawn in the area just below, which will slow people down; have this person shoot the mines as not to slow the group's progress.
Enemies are an issue on the way back too, so tether those on the upper level and / or below to help those carrying weapons.
The path with the weapons is down, right under the path, left of the gap, up the ramp and onto the Siege Engine on the right. The part by the gap and up the final ramp is the most difficult because of enemies, so make sure one or two players charge ahead and clear enemies as soon as you can. If people start carrying parts up that ramp and enemies are there, they will be wide open to attack.
Once people are successfully boarding the engine, there are four places the parts can go; on the right as soon as you board, on the left at the front when you board, one on the right path on the middle wall, and another on the back left of the ship.
While each part as a designated place, in the heat of swapping them over and moving them it'll be very difficult to know where they go, so it's best to follow a route of trying the right slot, then the front left slot, the far right slot then the back left slot. If it fits, you'll get a button prompt, in which case you can place it.
If you successfully put all the weapon parts in their positions in time, you'll restart the Siege Engine, and the encounter will be over. Phew!
Other things to know about the Siege Engine boss:
- As you might have read above, Hunter's Void tethers are good for keeping the groups of enemies at bay while others shoot or carry objects. Other Supers and Heavies are also good to clear enemies quickly, since you're constantly on the clock.
- While it applies to both phases, be wary of the electrified edges of the road at the start that'll shock and kill you if you stand on it.
- Reminder that the mines in the second phase will only trigger once the parts start moving. Having a player ahead of the pack will help clear them, but if someone is lacking behind after being revived, they could in theory help too.
- Some players in our team said they had significant damage when leaping from the top of the Siege Engine during the second phase, so do a double jump before landing to soften the blow.
Want more Destiny: Rise of Iron guides, tips and tricks? Then read our Wrath of the Machine walkthrough and guides, complete list of all Dormant SIVA Cluster locations, tips on how to reach Destiny's max Light level, how to complete the Exotic Gjallarhorn Quest, Khvostov 7G-OX Quest and Thorn Quest and new modes Vanguard Elite Strike Scoring and SRL.
Once the encounter is over, you can either leap off the end with the Engine to the cliffs below, or jump off the back and explore this latter area. Doing so will lead you to the next Outbreak Prime monitor, found by shooting the debris on the right side and entering a secret room. There are more specific instructions in that article if you're having trouble finding it.
When on the set of cliffs, you'll get a chest with Gear as well as a possible SIVA Cache Key chest. Enjoy the spoils, and the view, and before you continue, you can drop off the right side to a cavern underneath with the third Dormant SIVA Cluster location.
Head across the bridge, but before you go ahead, there's another hidden chest here too. Leap up the left ledges, across to the ones opposite, then up and into the central pipe up above to find it. No Gear here, but SIVA Key Fragments and a Legendary Engram await.
Once done, run through the door to enter the Server Room. There is the fourth and final Dormant SIVA Cluster in here, placed under the walkway as soon as you enter. You have to leap off the left onto the thin platform, then leap across again to the glowing red spot back towards the door underneath the walkway to get it. Throwing grenades along the way will help expose the edges so you don't fall, and as always, go one at a time as it's a little crowded. Again, no images here, but if you need to see exactly where we mean, see our Dormant SIVA Cluster locations page.
This Server Room is a bit of a maze, and you'll want to go all the way over to the right side to continue. Keep going until you reach a large red room filled with equipment, where you need to go along the left to continue. Note there are some more secrets along the way, including another Wrath of the Machine hidden chest and the final part of the Outbreak Prime monitor Quest, but once you're done exploring the stunning looking rooms until you have to drop down, which is the location of the Aksis fight and the final part of the Raid. Good luck!