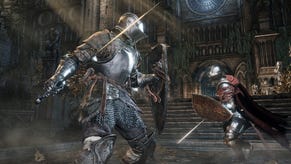
Dark Souls 3 - Irithyll of the Boreal Valley and Pontiff Sulhyvan
How to kill Pontiff Sulhyvan, along with a step-by-step walkthrough for making it through the Boreal Valley section of Dark Souls 3.
From the Lord High Wolnir bonfire head up the steps and outside, then light the bonfire to your left.
Carry on down the steps and head over the bridge to your right. About half way across you'll hear a scream from behind, so turn round and face your foe.
This guy is huge and brutal - his biting, lunging, and smashing attacks are topped off with fire breathing, and it'll only take a few hits to wipe you out.
If you can't quite take him on yet, don't worry and just run for the other end of the bridge and pass through the mist - he'll remain trapped on the other side.
Light the Central Irithyll bonfire, then head up the steps to the right and carry on up the slope. You'll run into a couple of pontiff knights who can inflict frost damage with their blades, but may drop armour when defeated.
Collect the large Titanite shard from the short stairs to the right and press on up the slope. There are a couple of ghouls in the next courtyard area, but they don't pay any attention to you until you're quite close, so they should be fairly straightforward to deal with.
Pillage the corpse in the fountain and then wait. To the left of where you entered you'll see a pretty imposing looking enemy with huge area-of-effect damage, and he's heading slowly towards you.
Keep the fountain between him and you to avoid being spotted, and when he's reached the other end of the courtyard sprint up to where he came from.
Dodge past the ghouls at the top of the steps and bear left when you reach the corner to the small balcony. There's a gem bug here, and it's also a safe place to wait until the next two pontiffs have passed if you're not feeling up to it.
Continue upwards and take a left at the top of the steps. Tucked in the corner is a Large Titanite Shard. Head up the curving stone steps and into the building ahead to find the Church of Yorshka bonfire.
Pillage the corpse by the altar and then head down the steps to the left. Head through the graveyard to the right and take out the transforming enemy who's having a nap, collect the Homeward Bones and the Undead Bone Fragment hidden behind the gravestone.
Next, take a quick trip to Firelink to upgrade your bonfire.
Return to Yorksha and head back out of the entrance. Turn left, grab the item from the balcony, and then perform a drop attack on the guy below - he's easy to stagger so stay behind him.
Pillage the corpse, then head up the short flight of steps, but keep to the left. Peer through the archway and the large enemy and most of his escort will begin walking away, leaving you with just the one to tackle.
Take him out and pillage the corpses in this area, then head through the large arch and turn left to find another.
Now head back to the church. Turn left to return to the graveyard and take the small flight of steps down to your left. Turn right at the bottom and head into the gloom - the lower floor is packed with ghouls, so tread carefully.
In the corner of the room opposite the large arch is a ladder. Head on up and make your way across the beams to pillage the corpse, then head for the small archway.
Drop down to the platform below, then turn left and drop down again. There are a few more ghouls around as you head down the stairs so look out for the glowing eyes.
Before descending the final flight of steps into the river, turn right and head towards the tree. There are ghouls lurking in the arches to your right so beware of ambushes.
Pillage the corpse under the tree, drop through the gap in the railings to get in a few surprise blows on the water-hag, then make your way along the river.
Stick to the left hand side as you pass under the bridge, as our old friend from earlier will put in another appearance - fighting him in the water is even trickier the second time around due to the reduced movement speed.
(For future reference we'll call this location Safe Haven.)
Head into the sewers and deal with the water hags you come across as you head towards the stairs opposite. Most of the items in here are lumps of dung, but there are some ashes in the small room at the bottom of the stairs.
Head up the stairs and through the kitchen into a large marble-floored room. There's a silver knight at the far-left end, and an archer up above to your right, so try and lure the knight behind the pillars by the windows to keep out of range of the arrows.
Once the knight is down, head through either of the arches where he was stood and you'll end up back outside.
Climb the steps. Around halfway up a pair of dogs will ambush you, and when you reach the tree with the corpse underneath it you'll be in range of a ghoul's projectile weapons.
Take him out then head to the top - dodging the next set of projectiles - and quickly dispatch the ghouls before running back down the stairs pursued by two more dogs.
Head back up the steps to the courtyard. There are two more ghouls and one last dog here to deal with.
The large arch in the courtyard contains an elevator that opens a shortcut back to the bonfire, so quickly nip up and open the door, then head back down and follow the stairs up.
In the next room there are a handful of ghouls on the lower level and upstairs, so clear it out then pop down the ladder to collect a Large Titanite Shard.
Head back up and through the arch, climb the next set of stairs and deal with another pair of pontiffs.
Before pushing through the fog door, take the other steps down to the bottom, kill the two ghouls, then open the gate to create another shortcut to the bonfire. Now head back to face the boss.
How to kill Pontiff Sulhyvan
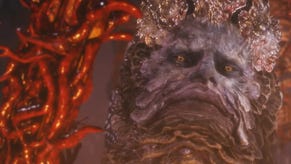
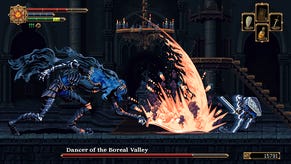
This guy wields two swords and can deliver both flame and cold damage. He also has a magic projectile attack, and will summon a ghostly clone of himself.
A fast weapon is useful here, and the best strategy is to stay just out of reach and roll to the left or right whenever he swings. If you get too close when he's not attacking, he'll unleash a devastating chain of blows that are difficult to avoid.
He's most vulnerable from behind, but he's got quite a tight turning circle which makes him difficult to flank. You should be able to get in four or five blows once you're behind him though.
If he summons the clone then ignore it as much as possible, as you can roll through its attacks fairly easily to focus on the actual boss.
Light the Distant Manor bonfire
Once he's dead, light the bonfire, travel to Firelink if you need, then head back to the church bonfire and make your way to Safe Haven.
Head left on the river, pillage the corpse, and head through the arch ahead to find the Distant Manor bonfire.
Head down the curving stone steps and turn left. The two ghouls below will run off, so head to where they were and quickly turn left to fend off the pontiff.
There's another large flaming cross-bearer patrolling below, so quickly run back up and time your descent to avoid facing him head on. If you wait until he's half way down the steps, you can drop from the corner and avoid him entirely.
There's also a Large Titanite Shard guarded by a couple of ghouls in the dark area below the top of the steps which you can grab while you're waiting.
Whether you fight or flee, head outside and down the rough steps. Take the arch to your left and move down the passageway to find the first Irithyll Dungeon bonfire.
- Keep reading for our guide to beating Dark Souls 3's Irithyll Dungeon area.
- Head back to the first page for the rest of our Dark Souls 3 guide.


