Dark Souls 3 - Cathedral of the Deep and the Deacons of the Deep
How to kill the Deacons of the Deep, with a complete walkthrough for making it through the Cathedral of the Deep section of Dark Souls 3.
Head toward the steps, then bear left right at the bottom to find a corpse at the bottom of the slope. From here, double back and head up the stone steps.
At the first landing take the path to the right and drop down, then follow this path up the slope which will take you to a corpse and give you a high vantage point to drop down on the enemy below. He's fast and equipped with throwing daggers, so keep your distance, block and wait for him to lunge.
The area at the top of the steps is guarded by three dogs and three fire archers. Keep to the left as you enter and use natural cover to help protect you as you clear them out, then head through the double arches. There's a solitary enemy to deal with here - just keep your distance, and when he bursts into flames retreat and let him burn out.
Approach the building, but turn left and head up the steps. You should be able to kill most (if not all) of the enemies here before they have time to get to their feet, then grab the Estus shard and head back to the building.
Head inside and open the doors, light the Cleansing Chapel bonfire and travel to Firelink to upgrade your flask. Return to your previous location, then head back outside and up the stone steps to your right.
Cathedral of the Deep farming spot
Take out the enemies again, and carry on up the path. You can farm souls here at a rate or around 900 per minute if you want. Pass through the cemetery gates and watch out for the constantly spawning undead. They don't pose much of a threat as they move very slowly, but they do have a fairly strong attack, and have a tendency to get in the way - you may want to thin them out as you go.
From the entrance, keep to your left and head down the path. In the next open area along, head right and follow the path until you come to a bridge to confront your first worm-like enemy. If these creatures hit you they'll give you a bleeding curse, so keeping out of reach is vital if you don't want your health to regularly take a massive hit.
Once past him, head up the stairs to the right and take out the double-scimitar, fire-breathing enemy, then head up the next flight of stairs. At the landing take the smaller stairs down to your right, then up and into the crypt ahead. At the bottom give the ladder a kick to give you a slightly safer route back to this area should you need it later (see below), then head up and out of the crypt.
From Cleansing Chapel, head outside and defeat the enemies sat around the obelisk. Next, turn right and drop down to the platform below and then down into the water.
Quickly sprint along the stream, then go up the slope on the right. Enter the building ahead and leap on the ladder - there's a wormy creature in the water, but you should be able to outrun him and make it to safety before he can cause you to bleed.
Clear the rooftop of enemies
Climb the long stairs opposite and head to the left of the upper area to find some loot hidden behind some crates, before heading through the small arch in the wall of the large doorway to what we're calling The Roof of Pain.
The lower area contains a couple of enemies, and an archer will take potshots at you from a high window at the far end, so dash in to attract their attention and then retreat so you can fight without having to also dodge arrows. When you return to the area the archer should now be on ground level with his back to you, so you should be able to deal with him easily.
Find the small wooden ramp leading down from the crumbling section of balcony and follow it down across the collapsed roof. When you reach the corner, an enemy will attack from behind the pillar, so be careful not to fall off when he attacks.
Cross to the large roof on the other side, take out the enemy with the flaming sword, and be prepared for an ambush of hat-wearing imps - one emerges from the ground at the short end of the roof, and two drop down from above at the other end. By treading cautiously though, you should be able to tempt them out one at a time.
Collect the item from the stone balcony, then fight off the two enemies that climb over the railing. Turn right from the balcony and walk down the narrow roof, keeping a firm eye on the archers ahead.
They're accompanied by a flaming swordsman, so the safest approach is to block incoming arrows as you descend, aggro the swordsman, retreat to let him burn himself out, and then return to tackle the archers.
The short flight of stairs leading up from here goes to a dead-end to the left. There's a large magic-user with a heavy club and a few self-immolating zombies here. Clearing them out will reward you with a duel charm which may or may not be worth your while.
Whether you collect that or not, head down the short flight of stairs and take on the tall enemy ahead. The small archway on the left of the platform leads to a room containing 2000 souls, but it also contains five imps - again, a tactic of aggroing and retreating is probably wise here.
Continue down the walkway and ascend the stairs just behind the small building. There are two more imps here, so it's best to take them out now to avoid surprises later. Head back down the stairs and deal with the flamer, then proceed to the large covered area.
A warden with double blades is patrolling around, and will be joined by another and two flamers that are triggered as you head inside, so again proceed cautiously and try and attract their attention one at a time.
Head up the long flight of stairs. Just to the left at the top, next to the double doors, is another not-completely-dead enemy, so take him out while he sleeps. Fight the enemies at the far end of this area, and then open the double doors.
Head inside, take the passageway to your left, and kill the black slime. Grab the item from the end of the corridor and head inside the room to fight three deacons - they're very slow, seem only to have fireball attacks, and should pose little threat to you at this stage.
Leave the room on the far side and step into the elevator on your left. Head down the passage, open the iron gate and the double doors, and breathe a sigh of relief as you return to the Cleansing Chapel bonfire.
Head back up the elevator. Take the long flight of stairs to the right and head down to find a magic-user with a heavy club at the bottom guarding a large soul. Collect it and head back up - you'll be ambushed by some slime when you reach the top.
Now head through the arch into the large vaulted room. There's a huge enemy in here that can deal massive damage, so don't stop to admire the scenery. As soon as you pass through the archway, turn right and just run as much as your stamina will allow.
Follow the platform round anti-clockwise and duck through the arch to the right at the end - with a strong tailwind and a good dose of luck you'll make it. (Note: you can hit the big guy, but we don't know if he's actually killable at this point and if he hits you it's an almost certain stunlock until you're dead - it's probably not worth trying to find out.)
Head down the stairs and take the left-hand turning when you reach the small landing. There are three imps here that may try and get involved later on, so taking them out now is a good plan - there's also a Seek Guidance scroll on the far side.
Kill the mimic with the Deep Braille book
Return to the stairs and head down. The chest you encounter in the anteroom towards the bottom is another mimic holding a Deep Braille book, so fight him if desired and then carry on down the stairs.
The chapel at the end is protected by a very heavily armoured knight, but if you don't fancy fighting him it is possible to lure him all the way back up the stairs and then make a run for it - he's slow on his feet so you should be able to outpace him easily.
Whether by running or fighting, head for the small arch on the left side of the chapel. Alternatively, you can avoid the knight completely by dropping down from the stone bridge where you fought the imps on the floor above, bypassing his trigger zone in the process. You'll take some fall damage, but we're on our way to a bonfire so it shouldn't matter.
Once through the arch, head straight across the large open room to the arch opposite, and head back until you find some stairs. Descend, open the iron bars, and follow the stone path until you come to two sets of doors.
The one ahead returns you to the Cleansing Chapel bonfire, and the one to your right reveals another elevator that takes you back to the start of the Roof of Pain area. Return to the large open area and move towards the huge enemy tucked away in the far left corner.
You need to get to the steps behind him, but the muddy water is full of black slime and reduces your movement speed considerably, so tread carefully. Sticking to the right-hand wall and then rolling between his legs seems to be a fairly reliable method, and if you're feeling daring there are items to collect as you go.
Turn left at the top of the steps. There are two patrolling deacons and some larger enemies, but the deacons can be aggroed and drawn out individually without rousing the others.
Once the deacons are down, follow the edge of the semicircular platform to stay out of sight, and head through the arch to another elevator. Head up and open the massive doors ahead to give yourself another shortcut to the Roof of Pain. Nip down the stairs at the other end to grab an item and then return to the semi-circular area via the elevator.
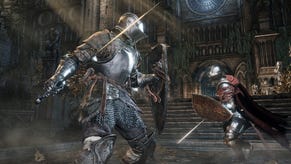
We need to get behind the altar now for the boss encounter, so you'll need to tackle the knight ahead. He's got a powerful overhead strike, but it takes a long time to wind up and leaves him vulnerable to attacks from the rear, so he's less threatening than he looks.
Take out the two deacons in front of the altar and then head round the back to start the boss fight.
How to kill the Deacons of the Deep
Another two-phase fight here.
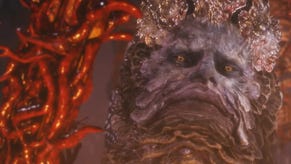
The first phase is relatively simple - there will be a large number of assorted deacons, one of whom will be glowing.
Kill the glowing one and an orb will jump to another. Kill that one and it'll jump again. Killing the other deacons will have no effect whatsoever, and they will continue to spawn indefinitely. Merely injuring the glowing one isn't sufficient either - they must die whilst they have the orb.
Things step up a gear when the boss gets to 50% health. The orb will now stay with a single enemy, and the others will bunch in around him making him difficulty to reach. He'll fire projectiles that can curse you, and if he's left unmolested for long enough he will start to heal.
If you circle round the large stone statue in the centre the group will follow you, and if you're quick enough you can get all the way around and attack the group from behind with slightly less resistance.
Once the deacons are defeated, head back to Firelink to level up and restock.
- Keep reading for our guide to beating Dark Souls 3's Farron Keep and the Abyss Watchers.
- Head back to the first page for the rest of our Dark Souls 3 guide.


