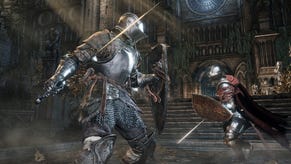
Dark Souls 3 - Archdragon Peak, the Ancient Wyvern and the Nameless King
Optional: our guide to how to get to Archdragon Peak and defeat the Ancient Wyvern and the Nameless King bosses in Dark Souls 3.
Now for the fourth and fifth of our five optional bosses, which are both found in an area called Archdragon Peak. In order to get there, you'll need to have defeated the second optional boss, Oceiros, the Consumed King.
If you didn't collect it already, head to the room where you fought Oceiros and pick up the Path to the Old Dragon gesture from the knight sat in front of the fountain.
Now head to the Irithyll Dungeon, down the steps, turn right, head left across the bridge, turn left at the end, and drop down to the corridor below. Turn left again and head through the door at the end, turn right, enter through the arch, and drop down to where you passed the giant earlier.
Head to the sewer entrance, turn right into the collapsed tunnel, and make your way to the large room filled with the branding iron enemies. Take the exit on your left, head up the stairs, and then use the gesture on the empty rug to the left of the baby dragon and wait 5 seconds or so to be transported to a new area.
Head up and right along the stone path. As you round the first corner you'll be confronted by a couple of snake-lizards armed with scimitars, and around the next corner you'll come under fire from up ahead. Dodge the fireballs as you make your way along the path and tackle three more snake-lizards then light the bonfire just ahead.
Walk up the broad stone steps and take the narrow path on the left when you reach the arch. Follow the stairs up and defeat the enemies above the arch - the second one is a little larger than normal and packs a fire breathing attack. Now head back down and pull the lever to open the portcullis, and make your way into the courtyard to trigger the boss fight.
How to kill the Ancient Wyvern
This boss fight is very different to the others - from the right spot, he can be defeated with a single blow, but getting there and timing it can be tricky.
When the fight starts, ignore the wyvern and head to the rear of the courtyard. Turn left at the top of the steps, head into the building in front of you, turn left again and cross the bridge, turn right, and follow the stairs up - you'll run into some resistance as you go, but as the boss packs a hefty fireball it's safer to leave the smaller enemies alone when possible, and only fight them when it's absolutely necessary.
When you reach the top of the tower, carry on straight ahead along the wall and climb the ladder at the far end. Turn left and follow the wooden platform, drop down a level, and then drop down onto the stone pillar below.
Now wait for the wyvern to lower his head and perform a drop attack on to the top of his head - timing and aim is everything, and it may take a few attempts to nail it, but once you land it you'll kill him with one shot.
Once he's down, you'll be transported again. Light the bonfire, then head into the building - a very well armoured knight wielding a heavy club will rise from the dead in the archway ahead, but it's worth defeating him as he drops a greatshield that comes in very useful against the next boss.
Head up the stairs and defeat the dark mage on the balcony, take a quick ride down and back up in the nearby elevator to open a shortcut, and then head down the steps at the back on the upper level (they're to the right of where you entered).
Make your way along the passage - there's a snake-lizard hiding in the second archway on your left, a couple with shields further ahead, and two more at the far end. Turn right and then head up the wooden steps to your left, past the large snake-lizard. Carry on along the narrow wooden walkway and grab the gem bug from inside the next area.
Head through the arch in the far right and follow the stairs around the outside of the building. You'll encounter two large cousins of the gem bugs, one from ahead, and one rolling in from the right, so deal with them and carry on up the steps - sadly they don't drop anything.
When you reach the flat area another wyvern will fly in, so take shelter in the archway to your left until he's gone before carrying on up the path. There are three more large gem bug type enemies near the top of the next flight of stairs, so deal with them and then head into the building.
Follow the stone walkway towards the dark mage ahead - another enemy will spawn from the stone ring as you pass, but you're better off dealing with the mage first as he fires projectiles which can make the other fight trickier.
Head up the short flight of steps behind where the mage was and pull the lever on the stone ledge just ahead to the left. After the cutscene, head a little further down the path and light the bonfire in the next building, then return to the lever, step out onto the fog ahead, and push through the fog gate.
How to kill the Nameless King
Aside from the final boss, this is probably the toughest in the game, and another one that's effectively two fights back-to-back.
If you've got enough Vitality to use the shield you picked up from the knight but still keep your Equip Load below 70%, then make use of it - it comes in very handy in the second phase of this fight. Lightning resistance is also useful, and if you have a weapon that deals dark damage, then make full use of it.
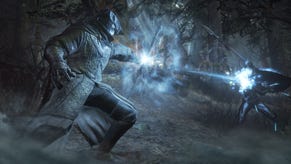
In the first phase, the Nameless King will be riding a wyvern, and you need to kill it before you can get to him. The best place to deal damage to it is from under its head - not only will melee attacks miss you, you'll deal more damage. Stay clear of its feet as that'll prompt it to take flight and attack you with fire breath, but if it does get airborne, then roll away rather than attempting to block the fire.
When the wyvern is down you'll be facing off against the King himself, and this can be a test of endurance as much as anything else. If you've got the greatshield equipped, stand as close to him as you can and block - his attacks should miss you entirely or deal minimal damage, and it prevents him from performing his most powerful combos.
Without the greatshield, you'll need to keep a large distance between you and him and try and get behind him when he does a lunge attack. Wait for him to strike (usually one big attack, or three small ones) and then deal him some damage - you only have a second or so's window to attack, so don't get greedy.
Once he's down you'll be returned to the bonfire - the area should be empty now, so take the opportunity to explore and collect any items you may have missed.
- Our walkthrough continues with a step-by-step guide to completing Dark Souls 3's Grand Archives and Princes of Lothric sections.
- You can find the rest of our Dark Souls 3 guide from the first page of this article.


