Fallout 4: Reunions quest walkthrough
How to get through the Reunions quest in Fallout 4, from killing the Stunned Yao Guai, to tracking down Kellogg with a little help from Dogmeat.
Reunions is the last main quest of Act One in Fallout 4 and will start immediately after showing Dogmeat the cigar you found in Kellogg's home at the end of Getting a Clue.
With Nick Valentine by your side and Kellogg's scent in Dogmeat's nose, it's time to track down the man that took your child, so follow our Reunions walkthrough for Fallout 4 for a step by step guide on how to complete it.
Reunions walkthrough for Fallout 4
Approach Dogmeat - who should be waiting along the walkway ahead - and keep close as he scampers through the streets toward your next destination. To begin with, he'll lead you through the market and out of the Diamond City. Once you leave the lobby and step back out into the surrounding streets, Dogmeat will head along a road to the south-west. Stay close and, soon, you'll leave the urban sprawl behind, entering the wilderness once more.
Before long, Dogmeat will come to a halt and start barking. This indicates that he's sniffed out clues pertaining to Kellogg's whereabouts in the area. Follow him down to the pond and grab the San Francisco Sunlights in the ashtray on the crate.
Once the cigars are yours, Dogmeat will tear off through the wilderness again. Stay close and follow him west along the railway track. As you near the animal carcass up ahead, you'll be ambushed by a group of feisty mole rats. Whip out your weapon of choice and deal with them swiftly.
When peace is restored, join Dogmeat by the blue truck a little further along the track and resume your journey. A short distance ahead, your canine companion will sprint down a flight of concrete steps to the right. Follow him to the bottom then take a right at the end.
Once again, Dogmeat will stop and you'll need to search for evidence of Kellogg in the area. Wait for your dog to bark, then join him near the doorway in the concrete wall. Immediately to the right of the doorway, you'll spot some bloodied bandages attached to a pipe. Take them and Dogmeat will immediately resume his pursuit of Kellogg.
Follow Dogmeat through the nearby doorway and loot the body on the ground - a weapon, ammo, the drifter outfit and several stimpaks are yours for the taking. Next, climb the steps to the left and, once you emerge out onto the upper level, eliminate the wild mongrels roaming the area. When it's safe to proceed, locate your canine pal (he should be off to the west), and rejoin him near the railway track.
Kill the Stunned Yao Guai
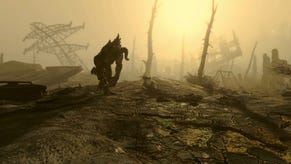
Keep following your doggy guide north-west. Shortly, you'll spot a broken tree trunk hanging over the track - make a note of its position and continue forward. At the end of the line, you'll be ambushed by an enormous bear-like creature lurking in the undergrowth to the right. This Stunted Yao Guai can deal (and withstand) a considerable amount of damage, so don't expect it to go down without a fight.
Once the battle begins, immediately launch a molotov cocktail at the creature if you have one - the fire damage will continuously eat away at its health for a couple of seconds, stacking on top of whatever destruction you deal with your main weapon. On that note, we'd suggest using a high-damage weapon, such as the Short Double-Barrel Shotgun, and focus on dishing out close-range, VATS-based head shots.
You'll quickly realise, however, that close-range combat makes you highly susceptible to the creature's deadly claw swipes. To avoid the attacks, you should immediately head south-east and return to the broken tree trunk you noted earlier. Keep the tree between you and your target and you'll be able to land close-range head shots while remaining completely shielded from its claws.
If the beast makes a dash for your position, simply circle the tree to maintain your cover. Continue to unload your weapon into the Stunted Yao Guai (and toss a few more molotov cocktails at it for good measure) and, eventually it will roar its last roar.
Continue your search with Dogmeat
When you're ready to continue, return to Dogmeat at the end of the track to the north-west and resume your travels. Shortly, you'll spot a station house on the right-hand side of the track. Climb the stairs to the rear of the building and step inside.
Drop through the trapdoor on the ground and loot the room below. You'll find bottle caps and ammo on the corpse, plus a few other goodies dotted around the room. Once you've finished exploring, climb the nearby ladder and rejoin Dogmeat on the tracks outside.
Continue north along the tracks and Dogmeat will duck into a small shack on the right, just before you reach the orange train carriage ahead. Enter the shack and descend the steps on the right. At the bottom, disarm the can chimes and make your way through the door. Take a right beneath the archway and an immediate left along the short tunnel.
Shortly, Dogmeat will start to bark again, indicating that he's found something of interest. Continue west and approach his position at the mouth of the tunnel. Next, examine the stout bottle on the small table by the chair to the left.
Now that Dogmeat has Kellogg's scent again, continue along the road to the west. Pass under the arch and cross the bridge, winding your way through the abandoned vehicles in your path. Watch out for feral ghouls as you go and deal with them swiftly.
When you reach the other side of the bridge, take a right and follow the road south-west. Stay close to Dogmeat and push onward until you spot (and hear) the decimated Assaultron lying on the right-hand side of the road.
Grab the stimpak from the First Aid tin near the overturned shopping trolley, then raid the wooden crate for another molotov cocktail and RadAway. Next, loot the yellow Protectron resting against the tree. When you're ready to continue, return to the Assaultron and activate its head, asking the robot what happened.
Once the conversation is over, resume your journey west along the road, staying close to Dogmeat. Shortly, you'll stumble upon a super mutant and his mutant hound - both of which will launch an attack as you near. Immediately step aside to avoid the super mutant's incoming molotov cocktail then move closer to prevent additional projectile strikes. Neither target is particular durable so use a high-damage weapon such as the shotgun to finish them off quickly, dealing with the super mutant first if possible.
When your opponents have been eliminated, loot their bodies and continue following Dogmeat. Take a right at the nearby junction and head north. Shortly, your canine companion will leave the road, travelling up the bank to the left.
Stay close and follow him north-west through the wilderness. Eventually, you'll reach a rusted chainlink fence where Dogmeat will come to a halt once more.
Again, you'll need to scan the area for clues. Locate the bloodied bandages hanging off the rusted fencepost and examine them in order to proceed.
When Dogmeat starts to move again, pass through the hole in the fence and follow him north along the overgrown street. Continue forward then stop once your dog scrambles up the steps of the building to the left.
Climb the steps and join Dogmeat at the top - you'll find him barking at the building's sealed-up entrance. Speak with him to begin the next objective.
Find a way into Fort Hagen
To continue, you'll need to find a way to enter Fort Hagen. Head back down the steps and begin moving west. Stick close to the building's north-facing wall to avoid alerting the sentry turrets on the roof to your presence.
Once you reach the rear of the building, enter Hidden mode and carefully climb the wooden scaffolding. At the top, immediately take a right and press yourself close to the nearby wall in order to avoid the turrets above. Next, move anti-clockwise around the wall and climb the ramp a little to the south.
At the top, turn left and, still in Hidden mode, slowly move toward the sentry gun ahead. If you've been cautious, the turrets should still have their sights trained on the ground below - meaning that you can sneak along the roof undetected. If your cover is blown, however, you'll need to eliminate them with a couple of well-aimed shots before continuing.
As you near the first turret, take a left and sneak north until you reach the blue walkway. Turn right and cross over to the adjacent rooftop. Next, turn right again and move south-east. Soon, you'll reach a large black hatch in the floor - prise the doors open and drop down into the building below.
Search Fort Hagen
Almost immediately on entering the area, several laser-wielding synths will attack. Unsurprisingly, laser weapons do energy damage, so you might want to equip armour with decent energy resistance before continuing. You can check an armour piece's energy resistance by looking for the little lightning bolt icon under 'DMG resist'.
When you're suitably equipped, take down the hostiles in the area. You'll find that frag grenades are effective against synths, as are rapid-firing weapons such as the armour piercing submachine gun - or the automatic Institute pistol that synths drop on death.
Once the enemy threat has been eliminated, enter the kitchen immediately to the right of your starting position and grab the Guns & Bullets magazine on the table - from now on, ballistics weapons will do +5% critical damage. Loot the area then enter the bathroom to the left of your starting position. You'll find a locked First Aid kit containing a blood pack, Rad-X and stimpak here.
When you're ready to continue, leave the bathroom and pass through the hole in the wall to the north. Immediately take a right (noting the cooking station in the centre of the room), then make your way through the next hole to the north. There's a turret parked on the desk here, so be ready to deal with it quickly. Finally, raid the locked ammo box on the desk then pass through the door to the west.
Continue west toward the far wall (keeping watch for the sentry gun in the corner of the room), then head through the door marked 'exit' to the south-west . Descend the steps and hack the terminal at the bottom. If you're successful, you'll be able to activate the nearby Protectron, offering additional support as you roam the area.
When you're ready to continue, pass through the doorway to the north and take a right along the next corridor. There's another synth through the door at the end - so head on through and eliminate it swiftly.
From here, enter the hole in the southern wall and immediately take out the synths patrolling the south-western corridor through the door to the right. When it's safe to do so, loot the locked explosives box in the room to the east (you'll find a fragmentation grenade and molotov cocktail inside) then travel back along the south-western corridor where you fought the synths a moment ago.
At the end of the passage, make your way through the doorway to the west and immediately deal with the sentry gun in the alcove to the right. Next, continue west through the hole in the wall and eliminate the synths to the right. Loot the duffle bag on the ground then continue along the corridor to the north.
Take out the turret
As the passage bends north-east, you'll be targeted by a ceiling-mounted turret ahead. Use the pillars and furniture in the area for cover and bring it down quickly. Note that there's a terminal on the column in the centre of the room which lets you deactivate the turret without destroying it - provided that you have the Hacker skill and can crack advanced terminals. You can also use the computer to open the security door nearby and enter the cage containing ammo and medical supplies.
When the turret is out of action, loot the ammo crate in the centre of the room and raid the cage if possible. Next, leave the cage and unchain the blue door opposite, creating a shortcut back to the start of the area. Finally, call the elevator to the north, step inside and press the button to reach the lower level.
Meet up with Nick
At the bottom, head south along the corridor and unchain the blue door to the left when you reach it. Head on through and wait for Nick to join you. Once your team has been reunited, return to the long corridor and continue south. Pause just before you reach the trolley on the right and crouch down to disable the laser trip wise.
There are more synths and another turret up ahead, so quickly run south and slip through the doorway to the left. In the next room, continue south and dispatch your opponents through the hole in the wall to the right. When the threat has been eliminated, loot the area (noting the armour workbench against the wall) then return to the main corridor.
Head through the door at the end of the passage and take a sharp right, descending the steps to reach the level below. At the bottom, follow the passage along and open the security gate. Wait for the energy trap on the ceiling to run out of juice then move into the next room. Raid the First Aid kit and ammo box behind the desk then make your way down the stairwell to the north.
When you reach the bottom, deal with the sentry turret along the passage to the left then head through the security gate nearby. Work your way along the next corridor and use the door at the end to access the Fort Hagen Command Centre.
Once inside the command centre, follow the corridor to the south and descend the steps. Enter the room at the bottom and continue east along the passage, eliminating the synths ahead with a well-placed frag grenade or two. When the threat has been quelled, continue forward and take a right at the junction. Head through the doors and follow the corridor along until you reach the doorway to the left.
Enter the sleeping chamber and raid the ammo boxes at the foot of each bed. Note the expert-level terminal on the wall (which unlocks the caged area in the adjacent locker room) then return to the corridor. Continue west and take out the ceiling turret ahead near the junction. Next, turn left at the junction and eliminate the second ceiling turret above the steps. Deal with any synths that approach then make your way down to the next level.
Take a right at the bottom and destroy the third ceiling turret. When it's safe to continue, follow the corridor around to the left and swipe the Rad-X, RadAways and stimpaks through the door on the right. Return to the corridor and, next, make your way through the door on the left a little further ahead.
Pass through the door in the north-east corner of the room and grab the Energy Weapons Bobblehead from the table which, as the description notes, will give you a permanent +25% gain in critical damage with energy weapons. Finally, crack open the explosives case in the room to the east then return to the corridor.
Make your way down the steps to the south and take a left at the bottom. Be ready to deal with another round of synths - including a tougher-than-usual synth patroller. When it's safe to continue, follow the corridor along until you pass through the doorway at the end. Take a left, climb the steps and eliminate the ceiling turret at the top.
Note the master-level terminal on the wall ahead (granting access to the adjacent room), then turn the corner to the right. There's another ceiling turret to deal with up ahead. Enter the reception room to the south and immediately deal with the final ceiling turret to the left. When the coast is clear, pass through the wooden door in the northern wall.
Confront and kill Kellogg
On the other side, raid the First Aid kit on the desk and the locked ammo box on the bed. Next, step through the doorway ahead. Follow the corridor around to the left, climb the stairs then pass through the door at the end.
When the lights come on in the next room, you'll see Kellogg up ahead and several synths guarding the area. Hold your fire, approach Kellogg and engage him in conversation. Begin by asking where Shaun is then insist that Kellogg take you to your son. When you learn that Shaun is at the Institute, ask Kellogg how you can get there. Finally, give him a sarcastic response and prepare to bring him down.
When the conversation comes to a close, you've got a few seconds (slightly longer if you choose the sarcastic response) before Kellogg and his synths open fire. Quickly turn around and take cover along the corridor from earlier. Hide around the corner at the foot of the steps and toss either a frag grenade or molotov cocktail back into the room, doing some preliminary damage to your targets.
Once the synths are eliminated, it's time to deal with Kellogg. As you'll quickly discover, however, Kellogg is equipped with a VATS-confounding invisibility cloak - making for a wildly irritating battle. In order to hit your target, you'll need to aim your shots at the barely-visible shimmer that appears as he moves around the room. Unfortunately, Kellogg isn't just invisible, he's also a damn good shot, and can bring you down in a couple of hits.
You should begin the battle by swallowing some Med-X to increase your damage resistance. Next, lure Kellogg toward the doorway at the top of the steps and take cover around the corner at the bottom. Start lobbing grenades through the doorway (avoiding the projectiles he tosses back) and, when necessary, retreat to refill your health. Eventually, Kellogg will exit invisibility mode, making the fight a little easier. Stay in cover and unload your most powerful weapon at him, retreating back along the corridor if he gets too close.
Search for more information
Once Kellogg finally goes down, collect the weapons, ammo and other assorted goodies - including body augmentations and terminal password - from his corpse. Re-enter the room at the top of the stairs and locate Kellogg's computer terminal on the white desk against the northern wall. Grab the nearby stimpaks and RobCo Fun magazine (which adds the Pip-Fall holotape game to your inventory), then activate the terminal. Read through the access logs then open the door using the Security Door Controls.
When you're done, approach Nick and engage him in conversation. Tell him that you need a way to find Shaun and he'll suggest that you talk to Piper, the reporter back at Diamond City. To wrap things up, let Nick know that you're ready to get going.
Discuss your findings with Piper
Climb the steps on the southern side of the room and take a left at the top. Head east into the next area and call the elevator at the end. Step inside, hit the button and begin your ascent. Once the doors finally open, move out into the corridor and use the terminal on the wall. Deactivate the turrets, open the door then step on through.
Back outside, marvel as the Brotherhood of Steel makes its dramatic entrance - a spectacle that adds the 'Reveille' quest to your log for later investigation. For now, take a right and descend the nearby ramp. At the bottom, head north and drop off the edge of the building. Next, call up your Pip-Boy map and fast travel back to Diamond City.
Once you reach your destination, head north-east down the steps and locate the second shack on the left - there's a large Diamond City's Newspaper sign above the doorway. Make your way inside and wait for Piper and Nick to finish talking. When they're done, tell Piper that you need help and explain that Kellogg is dead. Ask her what now and Nick will suggest that you visit Doctor Amari at the Memory Den.
Agree to the plan then, when Nick notes that you'll need a piece of Kellogg's brain, tell him that you already have something that might work. Decide whether you want to take Nick, Piper or neither along for the next part of your journey (we'll be taking Nick) and bring the conversation to a close. That completes your current quest and adds the next key quest - Dangerous Minds - to your log.
- Keep reading for our guide to completing Fallout 4: Dangerous Minds, the next quest in the game.
- You can find the rest of our Fallout 4 guide from the first page of this article.
You can also read our guides on where to find all of Fallout 4's Bobblehead locations, how to locate and romance all Fallout 4 companions, how to use cheat and console commands to help you out in combat, and how to get started with Fallout 4's base building.
Plus, we've also got a Fallout 4: Far Harbor walkthrough if you're looking for how to complete Fallout 4's main expansion.


