Fallout 4 - When Freedom Calls, Preston Garvey, Power Armour, Fusion Core, Deathclaw
How to complete Fallout 4's When Freedom Calls quest, from tracking down the settlers to clearing out Concord in your new Power Armour.
Enter the museum
As you approach Concord's Museum of Freedom for the first time, a fancy-hatted man on the balcony overhead will bellow in your direction. After a brief exchange, he'll instruct you to grab the laser musket on the ground nearby and step inside the museum.
Take the laser musket (optional)
Before entering the building, loot the raider corpses littering the corner of the junction and locate the laser musket lying against a nearby curb. Take the weapon then make your way into the museum, using the door at the top of the steps.
Locate the trapped settlers
Once inside the building, you'll need to locate the settlers trapped somewhere on the upper levels. Unfortunately, numerous gun-toting raiders stand between you and your goal - meaning that you'll need to fight your way through. Luckily, the first few raiders you'll encounter - situated on the balcony overhead - pose little immediate threat. Quickly race up the steps (noting the locked door ahead) and take a right through the doorway.
On the other side, follow the corridor along until you reach the room full of mannequins. If you haven't done so already, equip your newly-acquired laser musket via your Pip-Boy's inventory menu then head south-east into the next room. Pass through the doorway opposite then take a left and deal with the raider hiding behind the crates.
Next, head through the door behind the crates and you'll find yourself back in the main foyer - now on the other side of the locked gate you noted earlier. Take a left and move clockwise around the edge of the room, avoiding the sunken floor in the centre. When you reach the ticket office to the left, pilfer the contents of the orange tool case inside.
Next, continue moving around the foyer until you arrive at the large central staircase. Climb the steps then, once you reach the top, quickly turn around. From here, you'll have a clear view of the raiders on the upper landing. Take them out with a couple of well-aimed shots, moving closer and using the pillars for cover if necessary.
Once the threat is quelled, make your way through the open doorway to the north-east, near the top of the stairs. Take a left and enter the room with the mural - you'll stumble across two more hostiles inside. Bring them both down then pass through the hole in the broken brick wall to the north-east, taking a left on the other side.
When you reach the staircase around the corner, head up to the next floor and carefully approach the first doorway on the right. Shortly, two raiders will burst on through - crouch down and eliminate them one by one. With the coast clear, make your way through the door to the left and grab the contents of the orange toolbox.
Back out in the corridor, pass through the doorway that the raiders used earlier and take a right along the balcony. Up ahead, there's an open door, directly beneath an exit sign. You'll find the settlers that you're searching for on the other side - so hold your fire!
Talk to Preston Garvey
As soon as you enter the room, you'll be greeted by Preston Garvey - the man you spoke to earlier, out on the street. Tell him that you're glad you could help and ask him to continue. Find out more about the ghouls then get your new friend to explain his idea. He'll mention the abandoned power armour situated on the museum's roof - tell him that you're happy to help retrieve it. To end the conversation, agree to make your way down to the basement and grab the Fusion Core needed to charge the armour.
Unlock the security gate
You can access the basement through the collapsed floor at the foot of the main staircase. When you're ready to continue, retrace your steps to ground level, scurry down the sunken floorboards and approach the sealed security gate at the bottom. Next, use your amazing powers of unlocking to pop the gate open. Take the Fusion Core from the humming generator on the other side then return to Preston and his pals.
Put the Fusion Core in the Power Armour
Back in the settlers' room, head through the open doorway in the south-western wall and take a left. Walk to the far end of the broken balcony and make your way through the door on the right-hand side, beneath the glowing red exit sign. Out on the roof, interact with the power armour to insert your newly-acquired Fusion Core.
Enter the power armour
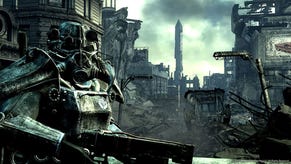
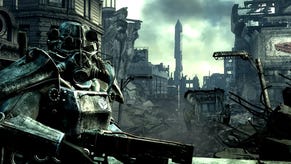
With the power armour now suitably charged, interact with it again to climb inside.
Grab the minigun
Before you stomp off anywhere, loot the toolbox and swipe the SSG Michael Daly log from the nearby desk. Next, work your way up the slope toward the wreckage of the downed chopper and take the Vertibird Minigun located inside.
Clear Concord of hostiles
With the minigun now in your possession, push forward and step out onto the upper roof of the museum. Carefully approach the broken wall ahead and peer down onto the street below. You'll see that the area is swarming with raiders - to continue, you'll need to make judicious use of your minigun and eliminate the enemy threat.
Start by taking advantage of your current rooftop position and deal with any hostiles in range below. Next, drop down to ground level and head north-west along the street, moving away from the museum. Eliminate any raiders that you encounter and prepare for the arrival of a huge, reptilian Deathclaw as you near the junction at the end of the road.
As soon as the creature appears, begin unloading your minigun into it - you'll be able to do a considerable amount of damage before it homes in on your position. If the Deathclaw gives chase, put some distance between you and your target before resuming your attack. Once the monstrosity has been defeated, eliminate any remaining hostiles in the area then return to the Museum of Freedom.
Report back to Preston
Back inside, you'll discover that Preston and his merry band have relocated to the lobby on the ground floor. Head on over and engage Preston in conversation. Check that everyone is okay then accept his reward. Ask what's next and you'll learn that the group plans to rebuild your old neighbourhood of Sanctuary. Agree to help with the restoration project then ask the old woman about your destiny.
When she reveals that Shaun is still alive, enquire about his location. You'll be told that you should head to Diamond City in order to continue your investigation - whereupon the Jewel of the Commonwealth quest will be added to your log. There are a few things you should do first before embarking on your next adventure, however.
Join Preston Garvey in Sanctuary
Bring the conversation to a close then leave the museum. Back outside, retrace your steps and return to Sanctuary in the north-west. Once you cross the bridge on the outskirts of your old neighbourhood, keep an eye out for Preston - he'll likely be patrolling back and forth along the street. Speak to him when you track him down.
Tell Preston that Sanctuary used to be your home - and reveal that you lived here 200 years ago. After you've finished discussing other survivors, Preston will ask for your help in establishing a settlement at Sanctuary. Agree to assist and Preston will suggest that you speak with Sturges nearby to see what you can do to help.
When the conversation is over, The First Step will be added to your quest list and the current When Freedom Calls quest will come to a close.
Talk to Sturges
Before you do anything else, you should visit Sturges in the yellow house on the right-hand side of the road, directly opposite your old home. Ask Sturges how you can help and he'll reveal that the group is in desperate need of beds. This will add the Sanctuary quest to your log. Note that the Power Armour Station, Weapons Workbench and standard Workbench located in the building's yard are now available for use.
It's worth taking a moment to restore your Power Armour to full strength while you're near the station. To do so, you'll need to step out of your suit and repair each piece individually, using the junk that you've acquired on your travels.
By now, your armour's Fusion Core is likely getting low, meaning that, soon, the suit's abilities and movement speed will become impaired. As you have no replacement core immediately to hand, you should leave the armour here for now and continue your journey without it. Before embarking on your next quest, however, don't forget to open your Pip-Boy and spending any upgrade points that you've accrued so far.
- Our walkthrough continues with a step-by-step guide to completing Fallout 4: The First Step.
- You can find the rest of our Fallout 4 guide from the first page of this article.


