Batman: Arkham Knight - militia device, Mercy Bridge, bomb defusion, Miagani Island
How to defuse the bomb, track down the Arkham Knight's vehicle, get to Grand Avenue Station and deal with the patrolling thugs.
Climb out of your vehicle and approach the flashing device on the ground. Interact with the object and begin the hacking process. Almost immediately, Arkham Knight's drones appear. You'll need to protect the device (a bomb, as it turns out) until the hacking process is complete.
Defend the virus upload
There are 16 drones to defeat in total and you're forced to stay close to the bomb throughout the battle - if you stray too far away, it will explode. Begin by taken down any drones in the immediate area to thin their ranks then focus on building your Missile Barrage gauge so that you can eliminate four hostiles at once.
Defuse the bomb with a controlled explosion
Once the last drone is down, you'll need to detonate the device with a controlled explosion. Place the Batmobile in Battle Mode and fire your Power Winch at the bomb. When you're locked on, carefully rev your engine to raise the needle into the red, just as you did before. Keep the needle in position for a couple of seconds and the electrical current will defuse the bomb.
Note that completing this sequence unlocks the Campaign for Disarmament Most Wanted mission. To complete it, you'll need to find and defuse seven more bombs located around Gotham City. There's one more device on Bleake Island, two to find on Miagani Island and three on the heavily-guarded Founders' Island.
Track the Arkham Knight's vehicle (continued)
When you're ready to continue, activate Battle Mode and enable your Forensics Scanner again. Locate the next set of tire tracks and follow them through the streets until you reach the Mercy Bridge. In order to cross the river and reach Miagani Island, you'll have to lower the bridge - and to do that, you'll need to locate the bridge controls over at Grand Avenue Station.
Proceed on foot to the militia access point at Grand Avenue Station
With the bridge out, you've no choice but to abandon the Batmobile and complete your next objective on foot. Begin by dropping off the bridge then immediately grapple back up. As you climb through the air, activate your Grapnel Boost Mk 2 to launch upward into the night sky. Glide across the water then head toward the next waypoint marker in the distance.
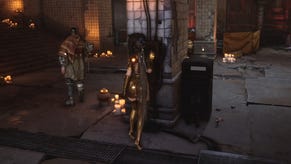
When you finally reach Grand Avenue Station, grapple up to the monorail track and position yourself directly below the building's red neon sign. Look down and you'll spot a chequered platform that stretches across to either side.
Face toward the station building and activate Detective Mode. Next, locate all eight armed hostiles in the area. Your first target is the lone stationary guard near the balcony railing to the left. Grapple over to the small outcrop on the corner of the wall behind him then activate Detective Mode again.
There's a second stationary guard further into the building to the south and another thug that patrols the area between the two immobile targets. Make sure that the roaming guard is moving away from your position then carefully creep behind the first thug and silently bring him down.
Next, take cover against the wall immediately to the south and peak around the left-hand corner. As soon as the roving thug appears and begins moving away again, slip in and take him out. As tempting as it is, don't attack the hostile standing by the balcony just yet - he's controlling the drone nearby and every guard in the area will be alerted to your position if you eliminate him.
Instead, return to the balcony where you took out the first thug and proceed down the nearby staircase. At the bottom, continue straight along the corridor and drop down into the first grate that you see. Continue forward and around to the right, then pop back up at the end of the vent. Immediately sneak south and duck into the next grate that you reach.
Activate Detective Mode and locate the lone gunman patrolling back and forth directly ahead. When he disappears behind the wall, continue south along the vent and take a left at the junction. Hold your position beneath the next grate then, once the gunmen passes overhead and stops near the window, take him down silently from behind.
When three guards are out for the count, Arkham Knight calls for each thug to report in. Once that happens, there's no way to avoid detection so hop back into the air duct and wait for the nearest thug to come and investigate. Quickly take him out from below as he draws near.
Before long, all remaining guards will home in on your position so deal with them quickly to minimise your chances of getting shot. For the most part, you'll be able to remain beneath the floor, popping out to eliminate unsuspecting enemies as they draw near. If opponents arrive in pairs or more, however, consider using your Multi-takedown to deal with them.
When the station is finally clear, follow the waypoint marker to locate the uplink terminal in the centre of the area. Interact with it to re-enable the bridge controls.
Rather spoiling the moment, Riddler pops up on the nearby monitors to issue another challenge. It seems that he's found himself a new feline friend - and, if you want to keep her alive, you're going to have to make your way to the orphanage.
- Our walkthrough continues with a step-by-step guide to juggling the Riddler's Blockades.
- Head back to the first page for the rest of our Batman: Arkham Knight walkthrough.


