Crown of the Old Iron King - Quicksword Rachel invasion, Recollection, Tower Key door, bonfire, Sir Alonne, boss guide
Deal with invasions, find spells and learn where to use the various Brume Tower keys as we approach the final boss of the downloadable content.
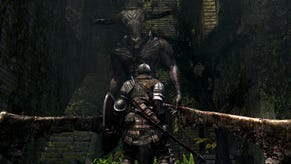
Next up, you need to head down the next passage where a Giant Club Demon is lurking. However, ranged attacks won't do the trick here, and close-quarters fighting is tough because the Demon's surroundings are a touch intimate for that sort of thing. Kiting it out into the open is one possibility, but it may be best just to hotfoot it to the lever on the left and open the gate. Or you can go back to the lever you passed earlier (near the initial flaming statue), which opens all three gates and creates more room to manoeuvre. Plus the Giant Club Demon will follow you, taking damage from the flaming statues, or from the explosive barrels in the large room if you can coax it into attacking in their vicinity and setting them off.
Anyway, once he's down, go through the lever-controlled gate it was blocking, which brings you outside. Take the passageway on the left and go into the room it opens onto. Go up the nearby ladder for a Dried Root, then pull the lever to raise another gate. (Doing this makes it easier to get to the boss should you die and be sent back to the last bonfire.)
OK, back down the ladder and outside again, then across the big chain and through the fog door. Go down the passage on the left, watching out for crawling enemies as you go. They're easily dispatched from range but will explode if they get too close, so be careful (they also move much faster when on fire). You'll see two initially, followed by a group of three further down the passage.
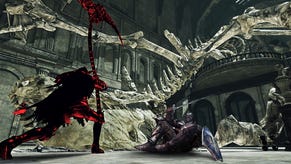
Grab the two Petrified Dragon Bone items beyond, then go through the door. Down the next ladder, dark spirit Quicksword Rachel invades and starts climbing the ladder. Go back up so you can engage her when she reaches you.
With Rachel out of the way, descend the ladder or take a detour for a Dried Root. If you want it, face the ladder and run toward the opening so you fall onto the platform below. Kill the crawling adversary in the room on one side, then hop over to the next room to get the Dried Root. Then fall down to the room below.
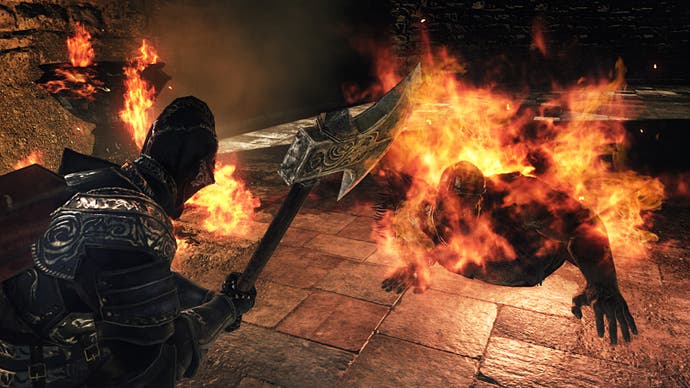
Either way, the room below has five doors. Standing in the middle facing the ladder, the door on the far right is home to another crawler. To the left of it is a room with a Recollection and two Twinkling Titanite items, although watch out for the Fume Sorcerer who pops up when you go near the items. The next two doors to the left are connected by a small passageway, with two crawlers behind the doors (behind the leftmost one).
The fifth door is the only one you absolutely have to go through. It has two crawlers behind it, one of whom helpfully begins to explode as soon as the door opens, so dodge back when you open it, then deal with the sped-up second crawler. It's easiest to retreat into the middle of the room then use a ranged attack on the second enemy as soon as it crosses the threshold. If it survives, just wait for it to approach, then roll away - it should explode, killing itself.
Go through the door, then down the ladder. There's a passage at the bottom with an open door at the end and several more crawling enemies beyond. You can hit one with a ranged attack, setting the rest on fire, increasing their speed. One or more may try to pursue you, but if not then tickle one from range to get its attention. Let it get close enough to start its exploding animation, then run to the ladder to escape the blast. The blast radius isn't that extensive, so you should be OK, and you can repeat the process for the others.
Now they're dead, check out the lever in front of the furnace and you should get the Scorching Iron Scepter for use with the minotaur head in the bonfire room. Go through the entrance to one side of the room, deal with the crawler you find there, then yank the lever at the end of the hall to activate the elevator. Move away quickly to avoid the crawler sitting on the elevator, then deal with it and head on up.
Go down the passageway you emerge onto and fall through the hole at the end. You'll see the door you went through after going over the last chain. Go back across the chain and to the minotaur head near the bonfire. Insert the Scepter and you'll activate two elevators in the room, which should be easy enough to locate.
Use the one on the left of the minotaur head to travel up to the level above. When you step off it, go onto the one straight ahead, and be quick about it because they move fast. At the next level up, go right and through the door at the end. There's another flaming minotaur statue in here on the left, along with an explosive barrel enemy and a Possessed Armor. Strike the minotaur head to kill the enemy further along - and maybe the one patrolling nearer to you if you're lucky. If the latter survives, use ranged.
On the right of the passage are a bunch of alcoves. Destroy the barrels in the third one (if they're still there) to locate 15 Lacerating Knives. Up the next stairs, there's another flaming statue that you can send down the next passage to take out a pair of explosive barrel enemies, leaving one more in the first left-hand alcove, along with three flaming sword enemies and two Axe Demons a bit further down the way. Some of these guys are near explosive barrels, offering impressive splash damage if you can fire at them, but make sure to deal with each adversary individually to avoid them ganging up on you.
The final alcove holds a chest containing four Smelter Wedges. Grab them, then fall through the nearby hole to get to the hallway with the lifts. Go to the end of it to the gated door. You should be able to unlock this with the Tower Key, although you don't have this yet. (We'll locate it in section 2A of this guide.)
Use the lift to go to the uppermost level, where you should be able to go up some stairs to spawn the first dark spirit Prowler. Take him out, then go up to the Ashen Idol and put in a Smelter Wedge to get another Soul of Nadalia, Bride of Ash. There are four more dark spirit Prowlers through the door on the opposite side of the room. Use the lift to go down to the lower floor to stop them overwhelming you. Going back up should let you engage one or two at a time, but if they continue coming as a group just go down and back up again until they don't. When they're all dead, head up the stairs at the top and round the corner to find another bonfire.
If you picked up the Ashen Mist Heart when you visited the Ancient Dragon atop the Dragon Shrine in the main game, you'll see a set of armour in the centre of the room is lit up. If you want to go into the memory and fight the boss, Sir Alonne, examine the armour. This fight is optional.
Memory of the Old Iron King
Go down the passage into the big room in front of you to go head to head with an Alonne Knight. Before ascending the stairway ahead, whip out some ranged attacks to deal with the Demon Frogs in the alcoves around the room. (If you don't have ranged options, it's possible to flank the frogs by using the hallways on either side of the room, which should allow you to take them out from behind with melee attacks.) Grab the items in the middle for five Smooth and Silky Stones, three Human Effigy and a Skeptic's Spice.
Head up the stairs and you'll see a hall on the left. Go down it to find a Rusted Coin. Another couple of Alonne Knights will then assault you from ahead, coming from a room that also has more Demon Frogs to deal with. The next passageway then circles back to the original room.
Go right to take on another Alonne Knight, deal with any lingering Demon Frogs in alcoves, then take the passage to the left as you approach the rear of the room. There's yet another Alonne Knight here and if you don't kill him he will run out and bring the fight to you.
This passage takes you back to the main room. Go on through it to tackle, you guessed it, an Alonne Knight, after which you should head down a hall on the left just before halfway across the room. This will lead you behind the Demon Frog blocking your path ahead. Take him out, then fall down the hole into the level below.
Keep going down the passage and you'll come to a more open area. There are five more Alonne Knights here and if you advance too far they will all come at you together, so don't do that - bide your time and proceed cautiously to avoid the collective ambush. Near the back of the room are three Repair Powders and five Radiant Lifegems.
Descend the stairway on the far right of the room, then go right when you hit an intersection to grab the Twinblade +7 in a nearby corner. Drop into the room ahead and use more ranged attacks on the Demon Frog over on the right.
The next passageway in the far right corner hosts one of our old friends the Alonne Knights. It also takes you round behind the Demon Frog if you're a melee player. The path in the far left has two Alonne Knights. Go along the path and up the stairs on the left to return to the main room.
No more Alonne Knights! Woo! Well, except the big man himself. Continue left into the hallway at the end, then go down the stairs to find a fog door leading to the fight against Sir Alonne.
Sir Alonne
You can rile up Sir Alonne in a couple of ways. One is to get in his face and do a lot of strafing; the other is to hang back and dodge his ranged attacks.
The strafing option up close will let you avoid most of his attacks, although sometimes he does a single lunging again and at others he has a two-to-three hit combo, so you will need to pay attention to his animations to figure out which is incoming and prepare your response accordingly. Obviously hit him between his attacks.
But Sir Alonne doesn't like a close fight, so he often jumps backwards, limbering up for his long-range lunge attack. You can dodge this as well if your timing is true, and doing so gives you a healthy window to pummel him with an attack or two, depending on your choice of weapon.
Using a shield to block Sir Alonne's attacks is also possible, but they inflict bleeding damage, so if you take a few too many in one go you'll take proper hits, not to mention losing considerable stamina in the process. His combo attacks are less of an issue, but they still won't leave you with much stamina in all probability.
Sir Alonne also has a projectile attack he uses from time to time. It's pretty fast, but he charges it up first, and if you see it coming you can dodge left or right to evade it. It will be easier if you start moving this as soon as he starts charging, then roll once you see it incoming.
At range, the projectile and lunges are your only issue. Wait for the dash before the lunge attacks and dodge-roll left or right just as he gets to where you are, but don't roll directly left or right - try to make it so you're moving toward Sir Alonne. This will allow you to close the distance and attack him while he's recovering from the lunge. Rolling backward is also possible but you'll need very careful timing.
Sir Alonne also has a jumping attack, which is fast and hard to dodge. When you see him jump, quickly dodge left or right. Don't hesitate though or you will take damage.
When Sir Alonne is down, you'll receive the Soul of Sir Alonne. Then go down the passage in the far right corner to reach a throne room. Examine it to gain a Smelter Wedge and finish off the memory.
Go to the first page of our Dark Souls 2: Crown of the Old Iron King guide for other strategies.

