Crown of the Sunken King - Dragon's Sanctum, Dragon Charms, altar, Eternal Sanctum Key
Use our guide to make it safely through the treacherous Dragon's Sanctum area of Dark Souls 2, and on towards the fight with Elana.

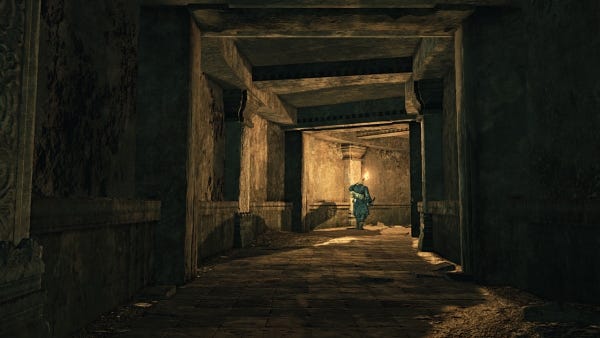
The biggest section of Crown of the Sunken King is packed full of traps and deadly enemies. Use our walkthrough to make it through to the first boss battle with Elana in fighting shape.
Dragon's Sanctum
Go downstairs and then give the switch to your left a good whack. Go through the door and grab the trio of Dragon Charms and the Soul of a Great Hero. Now go through the opposite corridor and throw as much ranged damage as you can at the enemy lurking in the next room in front of you. If you struggle to take him down, go down the stairs on your left, then enter the room on your right.

Two enemies are waiting for you in here, along with a pair of bodies on the altars. Kill the altar bodies first, then kill the enemies. You'll need to spread them out from one another as they're pretty tough - they can also fire from much further range than the other creatures you've encountered so far. When they're dead, loot all of the chests in the room.
Leave, then carry on along the next corridor. Watch out for an enemy attack from the left, and there's another one coming from the right shortly afterwards. Both of these enemies make use of poison attacks, so don't get caught in a corner - use the whole length of the corridor to avoid as much damage as you can.
When these two are dead, go back to the hall where the attack started. Watch out for the pressure plate on the floor here, as it'll trigger a volley of darts at your face if you step on it. At the end of the corridor is a pair of enemies. They won't detect you approaching them, so dish out as much of your own damage as you can before they respond.
Look out for the spell-slinging sorcerer on your right, as she'll start attacking if you get too close. Instead, kill the two enemies right where you find them, and have your shield ready if you're tempted to open the coffer after the fight - a volley of arrows will be launched at you if you do.
Once you've looted everything, kill the wizard from range, as well as the other enemy hanging around in the room to your left. If you only have melee options available to you, kill the sorceress as a priority.
Take the Human Effigy from the far wall, then use ranged attacks to kill the enemy you can just see through the door in front of you. When it's dead, activate the pressure plate to rotate the door until you can pass all the way through.
Once you've done so, go down the corridor on your right, then down the stairs you come to. When you reach the junction, go left and take the Repair Powder. Now go straight ahead until you come to a hole in the floor. Jump across it, then carry on towards the closed door. Hit the switch to your left with an arrow, then go into the opening on your left.
Return to the opened doorway and kill the enemy that attacks, then use your ranged damage to kill the enemies in the room downstairs. Watch out for another pressure plate at the top of this stairway, as it triggers a spike trap.
When the enemies are dead, go downstairs and take the Soul of a Hero and the Human Effigy as you go. When you get to the bottom, open up all of the chests and take the loot from inside. Head back to the hole you jumped over a little earlier, but this time fall down through it.
Turn around and and walk in the opposite direction from the sharp corner. Go downstairs, avoiding the spikes, then use ranged damage to hit the enemy in the spikes ahead of you. Once tapped, he should kill himself by walking into the spikes. Grab the items within the spikes, but be prepared for a minor ambush as you do so.
Walk down the path between the spikes, then climb up the ladder on your right. When you reach the top, you'll need to kill a sorceress to your left. When she's dead, turn around, go to the end of this path, then jump over the gap on your left to get into the next corridor. Make sure you light the bonfire to your right, then take the nearby Sanctum Crossbow too.
Go back the way you came and kill the sorceress, then go over the bridge to your right and downstairs. There's a coffer on your left which contains a Bloodbite Ring +1. Go back upstairs, then down the next set of stairs on your left. Hit the statues around the room to make the enemies attackable, then kill them.
Take the Eternal Sanctum Key and the Sanctum Knight Helm, then drop back down in the area with the spikes. Head back upstairs and kill the enemy lurking around the corner. Kill as many of the insects below you from range as you can, then drop down into the room and finish off any remaining enemies. Three of these creatures are on the ceiling.
When they're all dead, grab the items, then go upstairs and take the Throwing Knives. Kill the insect up on the ceiling, then go upstairs and use the ladder to reach the room above you. Open up the chest, then go through the door and down into the corridor below.
Go back over the bridge, then head downstairs and kill the enemy waiting at the bottom. Turn around and hit the switch that's right of the stairs. Carry on heading to the right, then go downstairs, and into the hallway on your right. Shuffle through the opening towards the end of this section, then go downstairs.
Grab the Old Growth Balm from the room, then carry on forward and go down the next set of stairs you come to. Keep heading down and kill the Invader, Jester Thomas. Look out for his fire-based attacks, and strafe around him to avoid the worst of his damage. Once you pass through the mist, head downstairs once more.
There are five monsters and a bonfire in the next room you come to. You don't have to light the bonfire, but you will need to kill at least the three enemies hanging around to your left. When they're dead, go up the stairs on your left, and use the Dragon Stone you looted earlier.
Go back downstairs again, and then go left through the door. Keep going through the cave here until you've got the Drakeblood Greatsword. Turn around, head back into the last room, and then hit the pillar to get a lift working. Activate the lift properly by treading on the pressure stone in the middle of it.
When you're up top, go through the door ahead of you, over the bridge, and then upstairs. When you reach the next room along, go through the gap on your right and then jump down until you reach the very bottom. Go through the next door, jump down onto the ledge below you and on your right, then go left and jump onto the next platform down.
Go through the door to your right and kill the enemy, but make sure you avoid his zippy attacks and attack only when his shield is down - he'll try to knock yours away too. Consider using a lance or a spear here, so you can keep your shield up while attacking.
When your opponent's dead, leave by the same way you came in and go right. Jump down onto the platforms below you and to your left, then go down the small stairs. Take the Hexing Urns from the corner in the corridor ahead of you, then go around the corner and kill another agile fighter. When he's dead, jump down the crumbled stairs, turn around, and go down the next stairs along.
Go right, then all the way around the left-hand corner and kill the enemy here. Now go around the next corner and open the hidden doorway that will take you to a bonfire. Once lit, keep heading around the next corner along and then go downstairs. Kill the enemy you come to, but watch out for a friend of his patrolling nearby. When they're both dead, go to the far section of this room.
Head down the next corridor you come to, then take the Drakeblood armour from the room at the end and to your left. Leave the room and keep going right, then leap over the ledge to your left. Should you land on the upper ledge, simply drop to the next one down.
Go towards the stairs and get on the platform below. Kill both of the enemies lurking around, then grab all of the items sprinkled around. Keep heading down using the crumpled stairs, then pass through the mist when you're ready to battle Elana.
Head back to the first page of this article for the rest of our Crown of the Sunken King guide.