Dark Souls 2 - Royal Rat Vanguard, boss walkthrough, Rat King Covenant
Use our Dark Souls 2 walkthrough to take the easy route from the fight against the Rotten, to the next battle with the Royal Rat Vanguard.
The route from the Rotten to the boss battle against the Royal Rat Vanguard is packed with nibbling enemies looking to take a chunk out of your face. Use our guide to make it through this area in one piece, and prepare for the battle with the next big boss of Dark Souls 2.
How to find the Royal Rat Vanguard
When you've finished killing the Rotten, go through the entrance that's a bit like a mouth up ahead, then kill the two zombies as you enter it, then the pack of rats in the room up ahead. Take care when fighting these latter creatures, as they'll come at you from all sides. If you've levelled up sufficiently though, you should find yourself able to dispatch each one with a single whack.
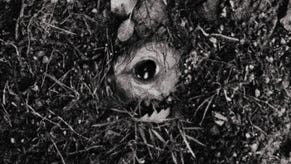
Go over to the far side near the open door to loot a Large Soul of a Nameless Soldier, then go through the door ahead of you and make your way upstairs. When you get there, you'll be ambushed by four more of those rats from over on your right. Kill them, but also make a mental note of that face on the floor at the top of the stairs - you'll need it later on.
When the rats are dead, take a left and then kill the zombie you come to at the end of the passageway. Take the item nearby to get your hands on a trio of Small Smooth & Silky Stones. Go back to that face you encountered earlier on and use your Pharros' Lockstone if you have one on you. Don't light up any other faces in this area of the game though, as they offer no tangible benefit.
"We recommend killing the rats first, while avoiding Rhoy's attention, before you focus on taking down the Invader himself."
Assuming you were able to make use of a Lockstone, make your way across the bridge and enter the room that lies just beyond it. Kill the rats that spawn over on the right-hand side of the room, then grab the nearby item to add two Poison Moss to your stash.
Now walk up the stairs to loot a Torch and a Whisper of Despair. The way forward from here is blocked right now, so make your way back over to the other side of the bridge, and then head to the furthest left section of the hall. When you arrive at a ladder, climb up it to get onto the next level.
When you reach the top, you'll be invaded by Rhoy the Explorer as well as a pair of rats - one comes at you from each side. We recommend killing the rats first, while avoiding Rhoy's attention, before you focus on taking down the Invader himself.
Now make your way forward through the shattered wall on your left to loot a trio of Homeward Bones. Walk over to the other end of this area, and light the bonfire once you've polished off the rodent attackers.
Once the bonfire's been lit, head down the corridor to your right until you see a patch of mist. When you walk through it you'll have to face off against a large number of those rodent creatures, before taking on the might of the Royal Rat Vanguard.
The fight against the Royal Rat Vanguard may not be the toughest you'll encounter in Dark Souls 2, but you'll want to pack some very specific gear to emerge victorious and in one piece. We'll walk you through both the preparation and the combat phases of this next boss fight.
How to kill the Royal Rat Vanguard
As well as dealing with the Royal Rat Vanguard, you're also going to have to deal with a hideous swarm of rats in this next boss battle. Take too many attacks from the rodents - even if you block them all - and you'll end up petrified, so make life easier for yourself and put on any equipment you have that can nullify this type of damage.
If you've followed our walkthrough from the beginning, the Ash Knuckle Ring you looted in the Gutter works really well for this fight. Make room for a little poison-protection gear as well though, as the Royal Rat Vanguard will throw plenty of that kind of damage your way during the fight.
Despite these gear-specific requirements, this is actually one of the easier fights you'll face in Dark Souls 2. As the regular rodents continue to pile into the room, defend against them as best you can. Once you've despatched a certain number of rats, a health bar for the Royal Rat Vanguard will appear on the screen signalling his arrival.
"Once you've despatched a certain number of rats, a health bar for the Royal Rat Vanguard will appear on the screen signalling his arrival."
As soon as you spot this health bar, keep an eye out for a rodent that has a huge amount of fur on its back. It can be quite tricky spotting this special rat, as it's about the same size as all the others, but you'll soon get a knack for spotting its rugged black fur. When you've found your target, lock onto it, and don't switch targets for the remainder of the fight.
This particular rat has more health than the others, but not a great deal more, so go on the offensive and lay into it until your stamina bar has been depleted. It should take you no more than two bars' worth of stamina to finish off this blighter - just back up a little between bars until you've recharged your stamina.
If you find you've taken too much damage to the face, simply get over to the other side of the room, and you should have enough time to quaff a health-giving item before the rodents catch up with you. When you're ready for battle once more, get back into the fray and focus again on killing the Vanguard. Once the creature's dead, his friends will simply flee the scene. You should be able to pick a few of them off as they run away, and bag yourself a few extra souls.
How to join the Rat King Covenant
As soon as the Royal Rat Vanguard is dead, make your way through the door towards the end of the room that was blocked by mist earlier on. Talk to the rat who's sat atop the bones in front of you. You'll be offered the chance to join his Covenant, and if you do so you'll be rewarded with the Crest of the Rat. Once you've made your decision, make your way through the hallway on your left.
Jump down into the next room to find yourself right back where you started, but be sure you don't fall into the next hole or you'll end up in the basement too soon. Grab the item nearby to pocket another Pharros' Lockstone, then go down the next hole to get on top of the coffins. Use the coffins on your left as stairs to get all the way down to the next floor.
When you finally drop down onto the rocky bridge you'll take a little fall damage, so make sure you're not close to death when you do so. Grab the item at the very end of this bridge to get hold of a Bleed Stone, then go over to the other side of the bridge. There's another item below you and to the right. Drop down onto the small platform here, and take the item to get a Disc Chime.
Before making your way to the next level down, just be a little careful. This will leave you in the room that's at the bottom of the Majula well - the one that leads to the Gutter. If you haven't already been down here since you last rested at a bonfire, you'll face an ambush when you hit the floor.
Don't miss our guide on how to beat Scorpioness Najka. Alternatively, head back to the first page of our Dark Souls 2 walkthrough for more guides.


