Dark Souls 2 - Huntsman's Copse, Creighton, Bandits, Undead Lockaway Key
Don't rush through the Huntsman's Copse section of Dark Souls 2. There are plenty of items tucked away, and we'll show you how to get them all.

The Huntsman's Copse region of Dark Souls 2 is a bit of a meandering place, but there are some decent items to be looted if you're willing to have a good rummage around. Use this section of our walkthrough to pick up every item in the area, before starting the fight against the Executioner's Chariot.
Huntsman's Copse guide
Get back to Majula and then enter the chapel-like building you used to access Heide's Tower of Flame. If you followed our guide from the beginning, you should already have spoken to Licia when she was in the tower. If so, you'll now find her inside this Majula building - if not, you'll need to talk to her in the Tower of Flame.

Have a chat with her once she's in town, and then get her to open up the path ahead in exchange for 2,000 souls. Keep walking down this newly-revealed path to get hold of a Rouge Water.
Keep heading down the narrow path until you come across a man sitting down on your right. Talk to this rather untalkative chap, then keep making your way forward through Huntsman's Copse. There's a bonfire to light here, before you start making your way up the hill.
Kill the enemy you come across, then enter the cave. Just watch out for the deadly green poison that falls down as you walk through the area. You'll eventually come across another enemy in the next tunnel along. Kill it, and then carry on all the way down the path before going up the staircase on your right.
Go through the door you eventually come to, kill the enemy just nearby, and then keep travelling down the path. Watch out for the ranged attackers littering this area. If you look down as you move along, you'll see where the enemies below you are situated. Drop down towards the left part of this section and kill the enemies. Grab the Bandit's Knife from the corner here, then kill the two enemies who are lurking upstairs.
How to kill the Bandits
"Keep a very close eye on that red object at the top of the trees here, as poison flows from it and onto your head!"
Now go down the stairs on the opposite side to get to the next floor down, and grab the Soul of a Nameless Soldier and Lifegem from just by the hole. Go back up the stairs and climb the ladder that's on your right. You'll be attacked by two Bandits who'll have to be killed, before you jump down to the lower floor ahead of you and loot the Lifegem and Poison Moss.
Jump down onto the next area below you, although be warned that you're going to lose a little bit of health to fall damage by doing so. Now make your way up the hill and get back inside the structure you left a moment ago.
Head to the left once more, but this time walk to the end of the path, pass through the door you come to, then kill the enemy you encounter. Now carry on making your way to the left. There's an opening just to your right, but ignore it for now, and instead concentrate on killing the enemy who pounces as you round the corner, before grabbing the Cracked Red Eye Orb.
Go through the opening you passed by a moment ago, and then climb all the way down the ladder you find at the end. Keep going around the corner to your left (just opposite the tree), then light the bonfire tucked away in a gap in the wall. Go back outside and whack the tree on your left to create a connection between this area of the region, and the very start of it.
Do a 180 and then make your way around the corner again. Keep walking down this path, but be ready to fight a pair of enemies as you make your way along it. Carry on towards the left of the bridge, but be ready to tackle the Bandit who attacks as you get close to the item lying on the ground. Loot it after the enemy's dead to get hold of a Large Soul of a Lost Undead and a Small Orange Burr.
Make your way to the other side of the bridge, kill the enemy who attacks you, and then jump down into the new area over to your left. Keep a very close eye on that red object at the top of the trees here, as poison flows from it and onto your head! Grab the item beneath the first poisonous tree you come across to loot a Lifegem. Quietly get up towards the enemy, kill it, and then grab the Aromatic Ooze behind him.
Exploring the domes
"Be aware that those Skeletons won't stay dead forever, and they'll come back to life after a certain amount of time."
If you head around to the right now, you'll find yourself at a dome. Go inside it via the right-hand part of the entrance and you'll get a Large Soul of a Nameless Soldier and a Morning Star for your trouble. Now leave the dome and make your way up the hill towards the left. Be ready to deal with an assault from a trio of Bandits, and there's a fourth opponent hovering over to the right as well.
Once all the enemies are dead, carry on walking along to the right, sticking close to to the very edge of the path. As soon as you spot a dome below you, jump down and into it to get hold of a Green Blossom and a pair of Poison Moss from one side, and a Soul Speak from the other.
Now make your way through the opening here, and jump down when you reach the end of the path. You'll find yourself standing on one side of the dome. Take a right and make your way back up the hill. Head straight froward to get to another dome by the wall that's in front of you. There's an enemy lurking inside. Kill the Bandit, then activate the lever to drop the bridge. Leave the dome and then cross the bridge you've just lowered.
When you're over the other side of it, keep to the left and then go over the new, smaller bridge. Once you've killed the Bandit here, go around the corner to the right. Be ready to fight yet another Bandit, as well as a ranged opponent nearby. Once the Bandit's dead, walk down the path, kill the next pair of Bandits who come your way, and keep following the path towards the right.
Don't worry about the gap on your left and the bridge on the right for now - just head straight along the path and kill every last Bandit standing in your way. Enter the dome that's on your left, kill all the Bandits inside, and then grab the Undead Lockaway Key. Leave the dome, then head left and kill another Bandit, as well as the Invader Roenna Merciless.
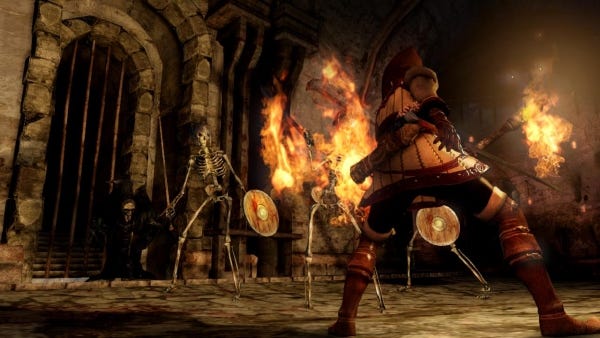
Once both enemies are dead, turn all the way around and then go across the wooden bridge that you passed by a little earlier. Kill the two Skeletons who attack you, then take a right into the opening as soon as you see it. Just be aware that those Skeletons won't stay dead forever, and they'll come back to life after a certain amount of time.
There's a Magic Mace and a Titanite Shard by another Skeleton just inside the area on your left. Grab them, but don't whack that vase near the items - you'll be poisoned with darkness if you break it. Once you've looted both items, keep walking along the corridor until you're outside and by the bridge once more.
Learn a new gesture
"Keep a very close eye on that bigger enemy. It's got a weapon that can still inflict a bleed effect, even if you manage to block the attacks."
If you use the key you looted earlier on the dome to your left, you'll gain access to a new bonfire. Light it, and then talk to Creighton to learn the fist-pump gesture. Leave the area and go back over the larger bridge, then walk down the hill and keep to the left. Go all the way past the dome and the poisoned trees until you see another bridge on your left.
Go over the bridge and kill the pack of enemies who attack you. Just keep a very close eye on that bigger enemy. It's got a weapon that can still inflict a bleed effect, even if you manage to block the attacks with your shield. Once your opponents are dead, make your way up the hill on your left and kill the enemy ahead of you. Grab the Notched Whip from the end of this pathway, then head back a little and go down the path on your right.
Exercise caution as you make your way down this path, as you'll be ambushed by a pack of four deadly, large Bandits if you move forward too quickly. As soon as you spot the first enemy, creep ever-so-gently forward until you've caught its attention. Now move back immediately to avoid drawing the whole lot of them, and kill the enemy while it's on its own. Keep repeating this game of cat-and-mouse until all four opponents have been killed.
Once you're through this section, you'll come to a bridge that leads towards the Undead Purgatory region of the game, not to mention the Executioner's Chariot boss fight. Before heading any further though, there are some handy items located underneath the bridge. Just be aware that you won't be able to get back up top after dropping down to grab them, so you'll need a Homeward Bone about you - otherwise you'll have to die to get back to where you are now.
Go across the bridge until you come to a hole, then drop down it onto the platform below - just be careful where you land, as you don't want to fall to a rather embarrassing death. Now jump across to the platform opposite you and grab the Pharros' Lockstone and the Token of Fidelity.
Drop down again into the spot between the two dirt platforms, then jump over the gorge so you can access the cave ahead of you. At the end of the path you'll find a Soul of a Proud Knight, as well as a Monastery Charm.
Jump down once more until you're at the very bottom of this area, then kill the enemy nearby to get at the coffer, and the Richard's Rapier inside it. Now use your item to go back to a bonfire, go back across the bridge, and this time jump over the holes in it as you head towards the Undead Purgatory.
Have a look through the first page of this walkthrough to uncover more Dark Souls 2 secrets.