Dark Souls 2 - Belfry Luna, Straid, mocking gesture, Fragrant Branch of Yore
We've got some essential advice for defeating all of the Dark Spirit enemies in Belfry Luna, and cleaning up on all the loot while you're at it.
Once you've finished fighting the Lost Sinner, you might be tempted to get stuck into the next section of the game - the Belfry Luna - straight away. Before you make your way over there though, you'll want to grab a couple of very handy items and level up in Majula. We'll walk you through the process from start to finish, and even show magic enthusiasts how to get hold of some new spells.
Find the Fragrant Branch of Yore
Straight after the fight against the Lost Sinner, open the pair of doors that are at the far end of the area, and then make your way downstairs. There's a coffer in the next room along which contains an Elizabeth Mushroom and a Fragrant Branch of Yore. This latter item rather handily un-petrifies living things, and you can make use of it in many places - including the upper section of the Lost Bastille.
Make sure you light the bonfire in the next room along. When you arrive back in Majula, go and sort your levelling out. You've got a few options to think about now. Non-mage classes could head straight to the Belfry Luna, or use that Fragrant Branch of Yore to innervate the path by Majula. If you specialise in magical damage, you might want to use it to un-petrify Straid and get some nice new spells.
How to unlock Straid
"If you specialise in magical damage, you might want to use it [the Fragrant Branch of Yore] to un-petrify Straid."
If you want to get hold of those spells, make your way back to Sinner's Rise and then climb down the ladder to get to the next level down. Head over the bridge towards the Lost Bastille, kill the lone guard on the far side, then kill the pair of enemies lurking in the next room along.
Once you're inside, make your way upstairs, and just tease the curiosity of the guards you encounter when you get to the top. You'll be able to lure them down that way, and pick them off just a little more easily. When you've defeated every last enemy, use your Fragrant Branch of Yore on Straid to resurrect him. Talk to him to get hold of the new spells - and learn the mocking gesture at the same time.
When you've finished, travel to the Lost Bastille bonfire. Make your way upstairs and go through the door at the top. Head over the bridge here and then make your way over to the right. As soon as you enter the next room, take the door to your left, then go to the end of the path until you come to a broken wall on your right. Jump down onto the roof below, then get over to the opposite roof using the wooden structure below you.
To the left of the ladder here is a Large Soul of a Nameless Soldier. Once you've picked it up, make your way down onto the section below you, and then kill the four dogs that attack you in a pack. Make sure you don't hit the well while you're dealing with these enemies - if you do so, you'll just bring more creatures to the fight.
When the dogs are dead, go into the cell in the corner, then dart straight back out again so you can kill the emerging enemies in a little more space. Once they're both dead, go back inside the cell and loot the pair of Flame Butterflies.
Where to find the White Knight
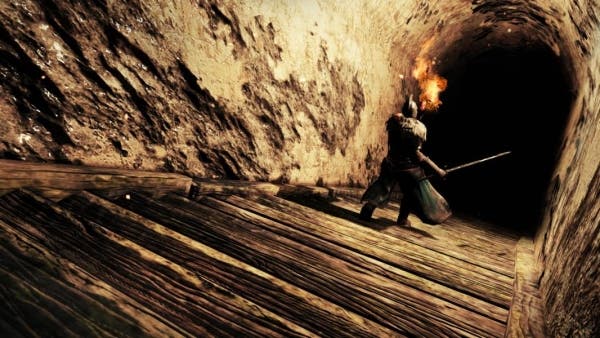
Return to the main room and then smash up the wood that's blocking an opening over in the corner of the room. This will grant you access to the courtyard near the entrance to the Lost Bastille. There's a White Knight hovering around the ladder in the courtyard itself. If you think you can beat him, it's worth doing so as you'll loot a moderately powerful Heide Spear and a decent chunk of souls.
Make your way back to where you were fighting the dogs, then go through the door right ahead of you. There are three guards here that you'll need to kill before making your way up the left-hand ladder. When you're at the top, you'll be able to get hold of a Large Soul of a Nameless Soldier and a Green Blossom.
Go back outside and then walk along the alleyway that's just over to one side of the building. Climb up the ladder at the end of it, then creep inside the building via the window. Roll into the boxes ahead of you to smash 'em up, and reveal a tight passageway in the process.
"It's not worth using your Pharros' Lockstone at the entrance here - it simply leads to somewhere you've already been."
Crawl through the space, kill the pair of enemies in the room you emerge in, then loot a Bone Staff from the chest that's over to your left. It's not worth using your Pharros' Lockstone at the entrance here - it simply leads to somewhere you've already been, so you'll just be wasting a precious resource on a different access point.
How to find the Belfry Luna
You've pretty much cleaned up the area at this point, so head back to the bonfire in the Servants' Quarters of the Lost Bastille, then climb down the ladder located just over in the corner of the room. You'll need to kill the dog prowling around down there, before using your Pharros' Lockstone in the middle of the wall. Whack the image that appears on the wall nearby, then walk through the newly-revealed corridor to gain access to Belfry Luna.
Belfry Luna guide
Walk through the door, then go and have a chat with the man sitting over to your right. If you choose to join the Bell Keeper covenant, you'll receive the Bell Keeper's Seal ring as a reward. Make your way upstairs, paying close attention to the dangerous gaps in the floor, then kill the Dark Spirit Bell Keeper at the top.
As for the Dark Spirit Invaders, they may not look too intimidating but they actually deliver a terrific amount of damage if they land a hit on you. Expect to take a lot of dark magic damage to the face as well. Even if you have a shield capable of blocking 100 percent of incoming damage, if it's not specifically resistant to dark magic then you will still take a solid thrashing here.
Once the enemies are dead, go and grab the item in the corner to get your hands on a Skeptic's Spice. Now jump down through the gap in the floor in the centre of the room - you'll take a little damage from falling down here, but it's unavoidable.
Now have a rummage around in the coffer over by the wall to get your hands on a Blue Tearstone Ring. In the corner of this room is an alcove. Head on over there and pick up the Skeptic's Spice, then make your way upstairs to the third floor.
How to kill the Dark Spirit Bell Keepers
"Don't get too far away from this pair of miscreants though, as they'll start chucking fire bombs at you if you position yourself too far away."
There are two more Dark Spirit Bell Keepers waiting to ruin your day up here. Not only that, there's the danger of the nearby explosive barrels to worry about as well. Try and keep moving around this area - being very careful not to whack the barrels - so that you split the two enemies up a little bit. Don't get too far away from this pair of miscreants though, as they'll start chucking fire bombs at you if you position yourself too far away.
When you've killed them both, ignore the mist for now, and instead make your way up the ladder on the opposite side of the room. When you get to the top, you'll need to kill three Dark Spirit Bell Keepers, one of which is the leader of the pack and dressed in red. If at all possible, try and trick them into taking a tumble into the room beneath you. If that doesn't work, you can still fight them on their floor, but make sure you stick to the centre of the room, move around a little, and take them on one at a time.
If you didn't manage to get the attention of every last Bell Keeper when you started the fight, be aware that there will be a couple of extra enemies lurking around the room. Make sure you explore all around the edges of this area until you're certain you've killed every last one. You'll also loot another Skeptic's Spice as you look around.
There's a chest in the corner which is well worth investigating. We received two Radiant Lifegems and Twilight Herbs for our troubles. Once you've finished stuffing your pockets, interact with the lever nearby to ring a bell, and draw up the gate that was blocking the mist on the floor below.
Don't miss our guide on how to beat the Belfry Gargoyle. Alternatively, head back to the first page of our Dark Souls 2 walkthrough for more guides.


