Thief (2014) - The Hidden City, Thief-Taker General tactics, kill the Graven, Graven City guide
Don't miss out on our essential guide to making it through the deadly Graven City alive, before taking down the Thief-Taker General himself.

Pay a visit to the Shady Merchant and stock up on everything you need before heading into the penultimate chapter of this year's Thief. Just like the last chapter, you're going to find it very difficult to make it through this section undetected. The good news is that you can pay a visit to the Shady Merchant before you take on the Thief-Taker General, so don't worry about using up your tools of the trade. If you're struggling for cash, don't use up any Blast Arrows you don't have to, as these are particularly useful for the boss fight.
Reach the Cathedral in Old Quarter
Head through the locked gate up ahead, and then climb up the wall. There's an anchor beam just above you that you should fire a Rope Arrow into. Climb up the rope very carefully, keeping one eye on the Graven on the nearby balcony, before leaping over the top when he's facing away. As long as you stick to the shadows after this, he won't see you at all. Once he's turned his back to you, knock him out quickly, but do it in the shadows so that the other enemy's aren't alerted.
Make your way out of the shadows and creep around the area, taking out as many Graven as possible using your Broadhead Arrows. This is the easiest way to clear the path ahead, but if you're going for any stealth awards, you'll need to be a little bit more patient and clear them out quietly.
Once you've taken out all of the Graven, make your way over to a crawl space that's just to your south. Go through it to get into the yard where two men are hanging around. Sneak up to them one by one and give 'em a good clobbering, then make your way up the crates to the south. Climb onto them to reach the Bell Tower, loot any treasure lying around, then climb up the rope and jump over to the stairs. Keep heading forward now to automatically complete your objective.

Descend into the Pit
"Now that you're in the Old Cathedral you can start exploring, but be very careful as the place is swarming with Graven."
Now that you're in the Old Cathedral you can start exploring, but be very careful as the place is swarming with Graven - getting through here undetected is very challenging indeed. Swoop down to take out the first Graven, then head towards the east and do exactly the same to the torch-carrying enemy.
The rest of the enemies are located to your north, so make your way quietly down the path that was previously patrolled by the dead torch-bearer. If you climb onto the crates that are by the eastern wall, you'll be able to take out one of the enemies with a brutal headshot. Now fire one of your Rope Arrows into the anchor beam above you, and make your way up to the balcony.
How you finish off the rest of these enemies depends on the particular status of your game. Whichever order you kill the remaining Graven in, make sure you stay in the shadows wherever possible, and pick them off individually. As soon as you're done, interact with the lever located in the southern part of the room, jump onto the supply lift, and get ready for a little ride.
Find a Way Up to the Graven City
Time to take the fight to the enemy's base. Once the supply lift stops moving, jump out and grab on to the wall. You'll need to shimmy along now until you can't go any further, and them drop down below. There's a valve here that you can turn in order to lower a nearby bridge.
That bridge will start ascending automatically, so don't hang about. Jump over to it, run across it as fast as you can, and then leap across to get back on terra firma. If you take a quick diversion into the alcove here, you can get your hands on a collectible item: Unique Loot (9/9) - City Artifact. If you haven't got the other pieces of this set, refer to the earlier sections of this walkthrough, or have a hunt around The City. Once you're done, head back the way you came, over to the other side of the bridge.
If you climb up the wall that's to your left, you'll eventually find yourself in a tunnel. Keep heading down it until you reach the proverbial light, but keep an eye out for the trap on the floor to your right. Disable it by climbing up to the very top of the room and hacking the control box you find there.
Pick up your loot from the floor, and then jump across to the eastern wall. Keep going through the tunnel until you come to some stairs, then start climbing them. When you find you can go no further, pick the lock on the door to your left and hack the control box.
Loot any treasure lying around nearby, then leave the area and climb up onto the crates before climbing the wall in front of you. Be very quiet when doing this, as you're about to find yourself just behind a pack of Graven. There's one in particular who's patrolling a walkway - jump up onto it, hide just behind the ledge, then leap over and take the Graven out when he wanders into the right position. That's one down.
Look to the east for your next target, and enter the tunnel when he sticks his head out. This is a pretty easy take-down if you sneak up nice and quietly. You'll now need to make your way back to the walkway to eliminate the final, torch-bearing Graven.
"You're not entirely out of danger yet, as there's a pack of deadly Freaks to deal with shortly."
You're not entirely out of danger yet, as there's a pack of deadly Freaks to deal with shortly. First things first, make sure you pick up any treasure that's been left lying around, paying particular attention to the tucked away sections that contain some serious loot.
Now follow your objective marker until you come across a seriously injured Graven - time this right and you might even catch the Freak assailant scurrying away. If you make your way forward through the boxes now, you'll find yourself in an area that contains a collectible item, as well as a handful of Freaks.
If you make your way through the tunnel, you'll see a handful of Freaks over to the east. Stay in position and get your Fire Arrows ready. You can shoot them in any order you wish, but you'll need to do it quickly, and with three very precise headshots. If you've followed our walkthrough from the beginning, you'll have the arrows and bow upgrades needed for this section.
Once you've killed the three Freaks, leave the tunnel and head down the stairs to your left. You need to fire a Rope Arrow into the anchor beam above you in order to cross over to the next platform. Jump over onto the other rope you can see ahead of you, then drop down onto he floor - note the Freak just ahead of you, then take him down using a Fire Arrow headshot.
Make your way back to the platform that was between the two ropes, pick the lock on the door, enter, then hack your way through the control box. You'll be able to loot The Mortal Coils (6/6) - Bronzehead Bracelet from the chest. Visit The City, or check back through the earlier parts of our walkthrough if this isn't the particular set item you receive.
Keep travelling north towards your objective marker, then turn the wheel you come across to open up a door. Pass through it to reach the next section of the map.
Make your way forward now until you come to a ladder. Once you've climbed up it, keep making your way up the crates ahead of you, then up the next wall. There are two Graven here, but if you keep your back to the wall you'll remain undetected. There's a crawl space that's up and over to your left - climb up and into it.
Your mission objective is now right below you, but wait until the guard enters the room, then leap down and take him out with an aerial assault. Slowly make your way into the next room and take out the second guard.
There's a little bit of loot here. Pick it up before you make your way through to your next objective, squeezing past any debris that's been left lying around. You'll need to turn the wheel you come across to open the door, but be careful when you head through as there's a pack of Graven waiting to ruin your day. Sneak your way through this area, save your game when you come across a cabinet, and just keep moving until you get a new objective update.

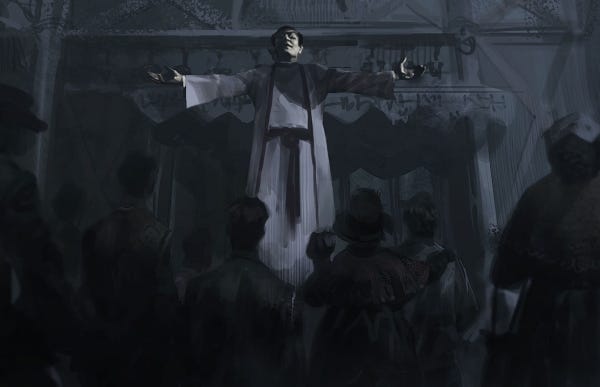
Enter the Rotunda
"When planning your targeting priorities,always take out the Graven hiding in the shadows before you kill any others."
There are four Graven in this area, and the best way to deal with the lot of them is to load up your Broadhead Arrows and get ready to fire. When planning your targeting priorities, always take out the Graven hiding in the shadows before you kill any others. That way you minimise the risk of causing a mass disturbance.
If you look at your map now, you'll see the Shady Merchant has made an appearance. Do not leave this area without sneaking your way over to him, and buying every single arrow you need in order to max out your carrying capacities. As we mentioned earlier, Blast Arrows are pretty much essential for the boss fight you're about to face.
As soon as you've taken out all the other Graven nearby - and hoovered up all the loot, of course - sidle up to the two remaining Graven who are talking to each other. When they split up, one will collapse into a chair, while the other will go off for a wander. When this happens, fire a rope into the nearby anchor beam, then climb up the northern crates and onto the walkway you can see up ahead.
Use the ropes to leap forward until you finally land on a walkway to the north. Keep walking all the way along this until you're able to pick up Memories of the Dead (6/6) - Elder's Memory. Again, if you've not been following our walkthrough from the beginning, you may loot a different item instead. Revisit some old areas, or go hunting around The City where many of the game's collectibles can be found.
Keep making your way towards your objective, but be ready for a fight. As soon as you turn the wheel and open the doors, you'll be treated to a cut-scene. When that cut-scene ends, you're going to begin the fight against the Thief-Taker General.
How to kill the Thief-Taker General
As soon as the cut-scene's over, run over to the nearest pillar and take cover behind it. A very quick way to ruin the General's day is to arm yourself with your Blast Arrows, then swoop counter-clockwise over to your right. Fire a Blast Arrow into his body, then quickly move to the next pillar and do the same again. Don't bother with headshots, as you want to guarantee landing a hit before leaping to the next pillar.
Choke Arrows come in handy here too, as you can use them to temporarily stun him and take a few more hard-hitting shots. Move fast, take your shots even faster, and you'll beat the Thief-Taker General in a surprisingly short amount of time. He'll drop down on one knee when he's just about done.
Whether you take him out or loot him is entirely up to you - just make sure you take Serendi Stone Circles (7/7) - Amber Circle from. Loot everything that isn't nailed down in this room, before turning the two valve wheels to open up the gate
Walk through that gate and you'll complete the entire chapter, unlocking The Hidden City achievement or trophy in the process.
Use our walkthrough to track down all of the collectible items in Thief.