Thief (2014) - The Dawn's Light, how to kill Primal Erin, Primal Stone guide, find the Dawn's Light
We've got a complete guide for the final chapter of Thief, including the tactics you need for beating Primal Erin at the game's conclusion.
You're very close to the end of Thief at this point, but there's one last boss fight to deal with before you're done. The good news is that you won't need any special weapons for the fight itself, so make use of whatever tools you need to on your way towards the game's conclusion. As always, stop by the Shady Merchant before starting the next section, and go big on buying everything.
Fire Arrows, Blast Arrows, Rope Arrows, you name it - buy everything you can afford. That should be quite a lot if you've been following our walkthrough from the very beginning!
Discover Where Orion Has Taken Erin
You won't get far into this mission before you discover a pack of deadly Freaks. Bear in mind that while they can't see you, they can hear you, so tread with extreme caution through this section of the stage. Specifically, avoid the glass on the floor and stay crouched at all times.
From the starting point, head in an easterly direction until you come to a wall. Avoid the stairs at all costs. Once you're at the wall, go right and then squeeze through a crawl space to find yourself right by a Freak. Use one of your Fire Arrows to land a clean and toasty shot on him - this will only work if you've upgraded your Bow Strength, and if you smack the Freak right in the head.
Once the Freak's been dispatched, keep heading down the pathway, taking a left when you reach the corner. You'll see another Freak loitering around just a little further ahead, so use a Fire Arrow headshot to knock him out, then scoot over to where his corpse is. Pick the lock on the chest that's close by to get your hands on The Pinned Castinets (6/6) - Mourning Bell. If you get a different part of this set, you'll need to go back though earlier parts of this walkthrough, or go skulking around The City to see if you can find it there.
Go back the way to you came until you can climb a wall to your left - just watch out for the patrolling Freak while you're doing so. As soon as you get to the top of the wall, kill the Freak with a Fire Arrow to the head, and then head south along the tunnel.
As soon as you reach the end of the tunnel, jump down and head to the right. Eventually you'll come across a locked door, so pick the lock and then make your way through. You should have cleared out every patrol by this point, but shut the door behind you to avoid getting a nasty surprise from any patrolling Freaks.
Find a Way to the Boat
"You need to get behind the crate ahead pretty sharpish if you're to avoid the attentions of the Graven patrolling here."
Jump down and head to the right, before passing through the crawl space in a northerly direction. You need to get behind the crate ahead pretty sharpish if you're to avoid the attentions of the Graven patrolling here. As soon as he's walked into a shadowed area, sneak around and clobber him to eliminate the threat.
Make your way back towards the crawl space, then head to the north and crawl your way through a cave. As soon as you exit it, make your way up the pipes on the left-hand wall - just make sure you hang on to the final pipe until the Graven begins walking away. As soon as he does, drop down to the floor and hide in the shadows. When the Graven comes back, smack him in the face with a Broadhead Arrow, making sure the body falls into the darkness.
There's one more Graven just above you. Make your way south, hugging the west side of the area, until you reach a control box in the south-west corner of the area. Hack it, then make your way up the stairs. As soon as you reach the top, kill the guard who's near the railing, then head up the next set of stairs. Open the door that's on your left, then swoop into the north-west corner. Ignore the Graven here, and just quietly make your way into the crawling space in the corner.
Board the Dawn's Light
Jump down from your perch and pay a visit to the Shady Merchant who's over on the right-hand side. Buy absolutely every last arrow that you can until you're at maximum capacity for each type - cash really shouldn't be a problem at this late stage of the game.
Make your way up the boxes that are just to the north of the Shady Merchant, but wait around here for a while until the patrolling Graven has made his way down the path. Consider darting into the shadows for some extra cover if you can. As soon as he turns around to make his way back up the path, quickly get behind him and knock him out.
Keep travelling up the path, sneak behind the next Graven you come across, pick his pockets for any goodies, then put him to sleep. Have a good hunt around here for any loot as well, and grab the arrows nearby if you've used any up until this point.
If you keep heading west along the ledge, you'll eventually come to a wall you can climb. Look upwards towards the south and you should see an anchor beam. Fire a Rope Arrow at it and jump across. Now climb up the rope until you can jump across to the next platform along.
Look to your south and you should see another rope. Jump over and grab it, then slide your way down to the bottom and get back down to ground level. There's a pipe ahead of you which you'll need to climb - just keep following it all the way along until you can't move any further.
Drop down onto the stairs, then make your way up and to the west in the direction of your objective marker. Eventually you'll reach a room that contains a fair number of guards. Get into cover behind the crate nearby, then wait for one of the guards to move towards you. As soon as he comes to a stop, get into position and take him out. Sneak your way over to the stairs just to the south, wait for another guard to inspect the desk, then get behind him and knock him out as well.
Make your way up the stairs and get in position towards the north-east side of the room you're in - make sure you swoop cleanly whenever you pass a source of light. Once you've reached the very top, wait until the guard here turns his back to you, then open the door and use your Blackjack to send him crashing to the floor. There's a chance he won't fall into a shadowed area when this happens, so by all means put out the nearby torch with a Water Arrow if you need to disguise your mischief.
Head back down the stairs you came up on, but pause when you reach the landing. You should be able to see two guards patrolling just to your south. You'll find it very difficult to take both of these men out without being detected. As soon as the coast is clear, head south and make your way up and onto the shelf that's by the alcove to the east.
When one of the Graven comes near, take him down with a headshot. The other Graven may well hear this commotion - if so, you'll have to deal with a few more of his friends quickly too. The best way to deal with this rabble is to deliver a succession of ranged headshots.
As soon as you've cleared this area, make your way west along the walkway, then head up the stairway to reach the very top level. Climb your way up the southern wall, and then drop down into a lift. When the lift stops moving, be prepared for a Graven to stick his nose in to have a snoop about. Stay in the corner of the lift so he can't spot you, then dart out of the lift and swoop to the left once he leaves. As soon as he returns to investigate once more, get in behind him quickly and knock him out.
Pass through the door that's over on the eastern side, knocking out the single Graven guard and looting everything in the room once he's incapacitated. Open the door that's south of you, sneak carefully behind the Graven nearby, and knock him out. Now head east until you've passed the lift you used to get to the area.
Enter the room near here and deal with the Graven when he moves over to the desk to have a look about. You'll be able to snag The Court of Montonessi (12/12) - Compassion Foul from this room, but only if you've been following our guide from the very beginning. If you don't get this particular item, check back through our walkthrough or look in The City.
At this point you've looted all of the special collectible items available in the chapter. Make your way through the door to your east. Fire a Rope Arrow into the anchor beam that's above you, then jump up to it and make your way onto the platform. Carrying on travelling south towards your objective, jumping down through the floor when necessary.
Follow Erin's Trail
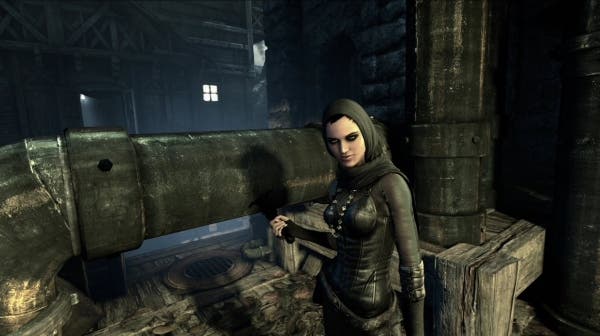
"Don't worry about the Graven in this section of the game. They've been frozen in time, so you can jaunt past them with a spring in your step."
Don't worry about the Graven in this section of the game. They've been frozen in time, so you can jaunt past them with a spring in your step - maybe even poke them in the eye if you feel like it. Just keep making your way towards the objectives markers until you catch up with Erin.
Get Close to Erin
There's nothing too tricky about this bit. Just make sure you're crouching at all times, and slowly sneak your way up behind Erin. Don't approach from the front or she'll move off. Tap her on the shoulder to progress the story.
Follow Erin's Trail
After interacting with Erin, she'll turn all of those frozen Graven into the far deadlier Freaks - not very helpful. If you stay crouched, you shouldn't have too much trouble sneaking past them all. Just keep making your way towards your objective. If you do have to fight any of them, a swift Fire Arrow to the face should be enough to shut them up.
Steal the Primal Energy from Erin
Again this is pretty easy, just walk up to her and she'll send you flying backwards. Next up is the final battle of the game.
How to kill Primal Erin
Don't expect a fight that's quite as easy as the one against the Thief-Taker General, but you shouldn't find this too arduous. If you look around the room, there are three Primal Stone pieces spread around, but you have to watch out for Erin's energy blast. As long as there's something between you and the blast, you won't take any damage. Get caught out in the open though, and you'll lose a massive chunk of your health.
Once you can make a move, run over and take cover to the left. When Erin completes her first energy blast, run to the north-eastern piece of the Primal Stone and grab it, before taking cover again. After getting close to you, she'll move away again towards the south of this area. The next piece you need is located on the walkway to the south, so head down there, grab the fragment, and then take cover immediately. After the next blast, run over to the north-west section below the walkway, jump down, and pick up your third and final piece.
Congratulations! You've now successfully completed the main campaign of Thief, and if you've followed us from the beginning you should also have every piece of collectible loot from the game too. You'll also be rewarded with The Dawn's Light trophy or achievement, depending on the platform you're playing the game on.
We've got a complete reference guide for every safe code in this year's Thief.


